Pages
▼
Tuesday, October 29, 2013
Lemon Ricotta Pound Cake
So now we are well into autumn and I couldn't be happier.
That crisp feeling in the air makes me smile. Every time I put on a pair of thick socks I get a little giddy inside. I just adore this season. I want to spend every day nestled in my little kitchen cooking and baking.
I broke out my cast iron pot and filled it with lemon, cinnamon, cloves and a splash of vanilla. I let it simmer all day. You can imagine how great it smells. It just fills the house up. It's also keep the air moist, which is a very good thing during the colder months when your heat is drying out your skin and sinuses. It's one of my most favorite things in the kitchen this time of year.
John and I are getting ready to get our Christmas crafting on. We're ordering supplies and mapping out a plan for this years project. I put a good dent in my Christmas shopping already. I shop early every year. My goal is to be done by Thanksgiving that way I can spend the weeks following crafting and cooking and baking. To me that's what the holiday season is all about. Sure it's great to give and receive gifts, but to me, the time you spend with your family and friends is really what is most important, so I try and focus on that.
I love to bake a what I call "weekend pound cake". The kind of cake you make on Saturday morning and leave on the table with the knife still on the plate so that you can just slice off a piece as you pass by. I love that pound cakes are a simple and no-frills kinda cake. Birthday cakes are just lovely, rich and decadent chocolate cakes are fine too, but I'll take a piece of pound cake over those any day of the week. Wrap me up in a blanket, hand me a book book, a cuppa tea and a piece of pound cake and I'm one happy girl.
Don't even get me started on pie.....that is a whole post by itself!
I found this recipe on a blog I love....Alexandra Cooks. I've made so many of her recipes, but this one might be my favorite of all. It was moist and tender and the little tang from the lemon just sent me over the edge.
I'm sure this would freeze well. Maybe baked in small loaf pans for Christmas presents? It's never too early to plan for Christmas! (At least not for me!)
Lemon Ricotta Pound Cake
Recipe from Alexandra's Kitchen
Yield = one 9x5x3-inch loaf or three mini loaves
3/4 cup (1 1/2 sticks) unsalted butter, at room temperature
1 1/2 cups cake flour
2 teaspoons baking powder
1 teaspoon kosher salt
1 ½ cups (13 oz) whole-milk ricotta cheese
1 1/2 cups plus 1 tablespoon granulated sugar
3 large eggs
1 teaspoon pure vanilla extract
zest of 1 to 2 lemons (I used 2)
2 tablespoons freshly squeezed lemon juice
Preheat the oven to 350ºF. Grease a 9-by-5-by-3-inch loaf pan or 3 three mini loaf pans with butter (grease pans very well). In a medium bowl, combine the flour, baking powder and salt. Stir to blend.
Using a mixer, cream the butter, ricotta and granulated sugar until blended, about 3 minutes — I never really go over three minutes, and it’s ok if there are some visible pieces of butter. In other words, the batter will not look entirely smooth. With the machine running, add the eggs 1 at a time. Add the vanilla, zest and lemon juice until combined. Add the dry ingredients, a small amount at a time, until just incorporated.
Pour the batter into the prepared pan and bake until a toothpick comes out clean and the cake pulls away from the sides of the pan, 50 to 60 minutes (or 5 to 10 additional minutes — cover loosely with foil if top is getting too brown) for standard loaf pan and 40 to 45 minutes for mini pans. (Note: Times might vary dramatically depending on the type of pan you are using. If you are using Pyrex or Corningware or some other glass or ceramic loaf pan, the loaves might take an hour or an hour and 15 minutes to bake. If you notice the top browning too much before the cake is finished, cover it loosely with a sheet of aluminum foil.) Let cool in the pan for about 15 minutes, then run a knife around the edges of the pan(s) and transfer loaf/loaves to a rack to cool completely.
Tuesday, October 22, 2013
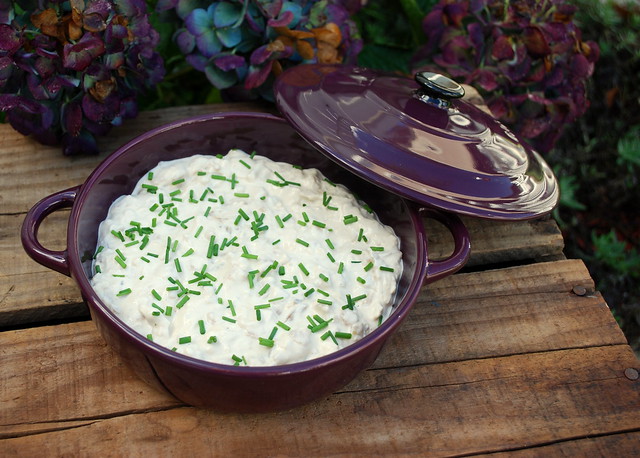
Fried Onion Dip
I don't watch too many Food Network shows. At one point, it was practically all I watched. I was taping everyone and then realized that I fast forwarded through 90% of the shows. So I stopped taping them. I still tape Ina cause I still love her simple, easy style of entertaining and the woman has some truly fantastic recipes (now if I could only handle her laugh). I love her, but that laugh irritates me. Sorry Ina.
About a month ago my Mom told me about a new show that she said she knew I would love called Heartland Table. I have to admit, I did not pay close attention and I never went to look for it on TV. A week later I was laying on the couch with a stuffy nose, freely pretty crappy, drinking my tea and channel surfing when I saw her. Amy Thielen. Rustic house, big garden, simple and easy cooking methods. I immediately clicked with her. If I had a TV show, this is what mine would be like. There is no giddy laughter, no pretentious house, no exotic ingredients, no fancy dishes. She is pure and simple and everything that should be revered about cooking.
I love this show.
I ordered her book from Amazon, The New Midwestern Table. I want to make so many of her recipes. I haven't been this excited about a cookbook in a very long time.
My friend Jenny started a Facebook page called Cooking from the New Midwestern Table. We'll be cooking and sharing Amy's recipes. If you like to join us, please head on over to the Facebook page and pick up a copy of Amy's book. It's a hefty hardcover. The kind of book you just can't wait to get dogged eared and food stained, at least that's how I like my cookbooks. Those are always the books with the best recipes in them.
The first episode I watched was called Bologna Days and featured a fantastic looking peppered pork lion, friend round bologna rings, homemade flat bread (that recipe will be coming up soon!) and this phenomenal Fried Onion Dip.
Most of you know I am an onion freak. My Maui Onion Dip is one of my most favorite dips of all time. Now I have a second.
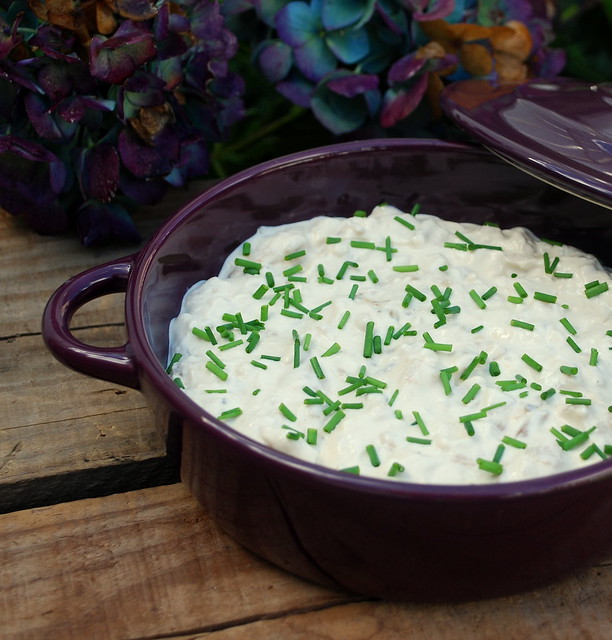
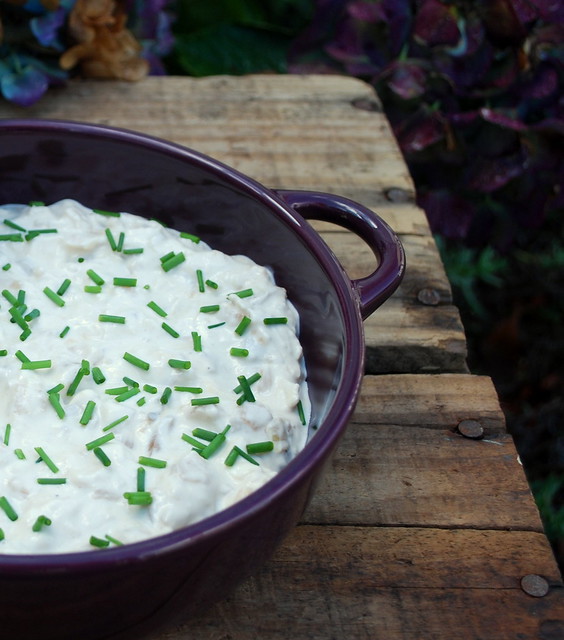
This dip comes together so quickly. It has the deep rich flavor that you would expect from caramelizing onions for a very long time. The clarified butter and vermouth send it over the top. Don't skip those steps! Trust me!
I made this for a little get together with friends. I was thrilled that I had a smidge left the next day. I smeared it on some crusty bread and topped with some roasted chicken. Oh my. I am in love with this dip.
I'm going to make it for my son's birthday party this weekend.
I will need to double the recipe!
Fried Onion Dip
recipe from Amy Thielen - Heartland Table
4 tablespoons (1/2 stick) salted butter
1 medium sweet onion, cut into 1/2-inch-thick rings
Fine sea salt and freshly ground black pepper
1 teaspoon honey
3 cloves garlic, chopped
1/4 cup dry vermouth or dry white wine
3/4 cup sour cream
1/4 cup (2 ounces) cream cheese, at room temperature
1 tablespoon finely chopped fresh chives, plus more for garnish
Dash of cayenne pepper
First, clarify the butter so that you can fry the onions at high heat and put a very dark, almost burnt crust on them. Please don't skip this step. It does something magical to those onions and it's very easy to do.
Heat the butter in a small skillet over medium-high heat until it foams and browns. Keep an eye on it. It can go from brown to burnt in a matter of seconds. Remove from the heat. Tilt the skillet and carefully spoon off the foam, saving it in a small bowl. Pour the clear butter into another bowl, and pour the dark dregs at the bottom of the skillet into the bowl with the foam. Add the clear butter to a larger heavy skillet. I used a cast iron pan. (Discard the butter foam and dregs.)
Heat the skillet over medium-high heat. Add the onions, 3/4 teaspoon salt and 1/4 teaspoon pepper. Fry the onions, flipping them now and then, until they're dark on the edges, even black and crispy in spots, about 10 minutes. Add the honey and garlic and cook for 1 more minute. Add the vermouth, bring to a simmer and cook until the liquid thickens, about 3 minutes. Remove from the heat and let cool.
Put the sour cream and cream cheese in a mixing bowl and mix with a rubber spatula until smooth. Finely chop the fried onions on a cutting board and add them, along with their pan juices, to the cream cheese mixture. Stir in the chives. Add the cayenne and season with salt.
Transfer to a small bowl and garnish with more chives. (This can be made ahead of time and refrigerated.)
Wednesday, October 16, 2013
Rustic Apple Tart with Maple Glaze
Hello lovely readers. It's been a heck of a few weeks for me.
My Dad ended up in the hospital after his defibrillator shocked him out of his chair 3 times. He ended up having a procedure done, was sent home and then a day later was shocked again. They sent him to Brigham & Women's in Boston for another surgery yesterday. What a whirlwind. Here we were in Ohio on vacation getting this news. To top it all off it was his birthday when he got taken back to the hospital. He had a five hour operation yesterday and everything went wonderful! I can finally breathe. I talked to him on the phone this morning and he sounds great. Phew.
We also headed out on vacation last week. We had a wonderful time in Ohio visiting my in-laws. We went to the Football and Rock 'n Roll Hall of Fames. Amish country (love!) and a huge craft's festival in the woods. It took us over 3 hours to see everything. I bought a gorgeous primitive Christmas sign, a handmade dip bowl, and a wooden carved spreader. We also visited an Amish market. I was in heaven. It was loaded with spices and grains, all sold in bulk and they had some of the most amazing cheeses' and butters! I bought 5 pounds of the butter and lots of spices and oats, popcorn, etc. Can't wait to start cooking with it all!
I made this tart before I left on vacation. It is my Dad's favorite and since I was thinking about him constantly, I decided to make it.
I blogged this back in 2009. I've been making it ever since. We love it so much. It's a staple every Thanksgiving. My Dad is pretty picky when it comes to desserts, but he loves this one.
It's very strudel like, no puffy apples in this.
It is made with cornflakes. Yes I said cornflakes. I know it sounds strange, but trust me, it works. You don't even know they are in there.
The maple glaze on top just brings this to a whole new level of goodness.
This is one of those recipes that I will pass down to my grand kids. I just know it.
Rustic Apple Tart with Maple Glaze
1 double pie crust - yes I used Pillsbury. No shame!
1 teaspoon flour
1 egg white, beaten
Filling
1 ½ cups corn flakes (don’t crush them!)
6 cups thinly sliced peeled apples, about 5 medium
¾ cup granulated sugar
1 teaspoon cinnamon
Glaze
½ cup powdered sugar
3 tablespoons maple syrup
Heat the oven to 350. Place one pie crust on a work surface and sprinkle with ½ teaspoon of flour. Now rub the flour all over to coat the crust. Place the crust flour side down on an ungreased cookie sheet lined with parchment.
Sprinkle the cereal over the crust to within ½ inch of the edge. Top with the apples. Yes they will be piled on there. Combine the sugar & cinnamon in a bowl and then sprinkle it over the apples.
Now take the other half of the crust and just slightly roll it out just a bit. You want it to be a little bit bigger than the bottom crust. Don’t go crazy and make it pizza pie size, just gently push it out maybe a half-inch bigger.
Place the pie crust over the top of the crust on the cookie sheet. Fold the edge of the bottom crust over the top crust, pinch the edge to seal and flute. Cut several slits in the top. Brush with egg white. I sprinkled mine with demerara sugar just before I popped it into the oven too.
Bake 45 to 55 minutes, or until crust is golden brown and apples are tender.
In a small bowl mix the glaze ingredients until smooth and drizzle over the warm tart. Serve warm or cold. If you topped it with some vanilla ice cream I wouldn’t squeal on ya either.
Tuesday, October 1, 2013
Baked Pierogi Casserole & the Giveaway Winner
Yeah it's October! My favorite month! Just had to throw that in.
Thanks for all the sweet words about my 1,000 post. Those of you who comment and take the time to share with me your thoughts and true thankfulness for this blog are what keeps me going. I know if I post 15 times a month or 5, you are always there with great enthusiasm and kindness for everything I make. That makes me happy.
We are off on vacation next week to see my in-laws in Ohio. We are so excited! We'll be headed to the Rock and Roll Hall of Fame and the Football Hall of Fame, but I'm most excited about going to Amish country and attending a huge craft fair called Shakerwoods Festival. Listen to this:
While on the grounds, bring your walking shoes for a journey down the rustic paths throughout the beautifully manicured woods, while enjoying the aroma of great country cooking over open fires and the sound of free entertainment located at two different stages throughout the woods. If rest and relaxation are your desire during the day, enjoy one of our extraordinary man-made gardens that only Shaker Woods can deliver. It's simply relaxing.
All that and over 200 crafters! I can't wait. I'm ready to pack that car with Christmas presents!
So I shall be scarce next week. I'm hoping to whip up a few apple recipes this weekend as soon as I'm done packing. Stay tuned for those as soon as I return.
I'm leaving you with this Pierogi Casserole. This is so simple. Simple, simple, simple but it's so good. It's actually one of those recipes you can cook on a weeknight after you get home from work. You can certainly use fresh homemade pierogies, but when you want to get supper on the table in a hurry, the frozen ones work.
I believe I found this recipe on Pinterest, but I didn't pin it, I just printed it and then realized that site was not listed on my print out, so I apologize if this was your original recipe whoever you are! I did tweak the amounts in this from the original a bit. There just wasn't enough sauce to cover the pierogies.
When I made this I used 1 1/2 pounds of pierogies and doubled the sauce amount. I have a crew to feed! I also fried up a bunch of onions. They were the perfect accompaniment to this dish. Our friend Mitchell was over when I made this and he declared it "DELICIOUS!". Yup he said it that loud.
Baked Pierogi Casserole
1 pound frozen pierogies (I used Mrs. T's Potato and Onion)
2-3 slices cooked bacon, crumbled
3 ounces cream cheese
1/2 cup chicken broth
1/4-1/2 cup shredded cheddar cheese
chopped green onions, optional
Preheat oven to 400 degrees. Lightly spray 13x9 baking dish with nonstick cooking spray. Arrange frozen pierogies in dish. In a saucepan, mix cream cheese and chicken broth stirring frequently until cheese is melted and smooth. Pour melted cream cheese mixture evenly over pierogies. Sprinkle evenly with cheddar cheese. I didn't measure the cheese, just cover the pierogies with it. Bake 20-25 minutes until cheese is bubbly and pierogies are warmed through.
Garnish cooked dish with crumbled bacon & chopped green onions.
*I use one and a half packages of pierogies and double the sauce when I made this. I also fried up a bunch of onions to go with it. Delicious!
Thank you for all your comments here and on Facebook too. I picked one name from the blog and one name from Facebook, put the two names in a basket and chose one. The winner is:
GIVEAWAY WINNER! - MARYANNE SAWYER!
I can't believe Maryanne is from Rhode Island. Honestly I didn't plan that!! Congrats Maryanne! You'll be receiving Kendra's cookbook in the mail sent directly from her and the dish from me! Enjoy!