Tuesday, August 13, 2019

I’m still here.


I


Yes I’m still here.

I know it’s been a little over 2 years. I know some of you might have thought oh I guess she’s done blogging, but I’m not!

Long story short….. A little over two years ago I started to get some pain in my lower back. It was really starting to get bad and I went to my primary care doctor and we did just about every test you could think of and the last test that I had was a CAT scan and that test showed that my cancer had returned. Just when my life was pretty much back to perfect, my treatment started all over again. This time it has spread to my skull, my ribs and my spine. I went through chemotherapy again, and massive doses of radiation.

I won’t go into all the details but I will tell you that I was extremely sick this time around. The cancer affected my eyesight, and I could only see double vision in my left eye for about eight months. I couldn’t watch TV, I couldn’t read, I couldn’t really function very well at all. I was vomiting profusely for months, which prompted a few visits to the hospital. It really was much worse this time than it was when I had the breast cancer in 2015.

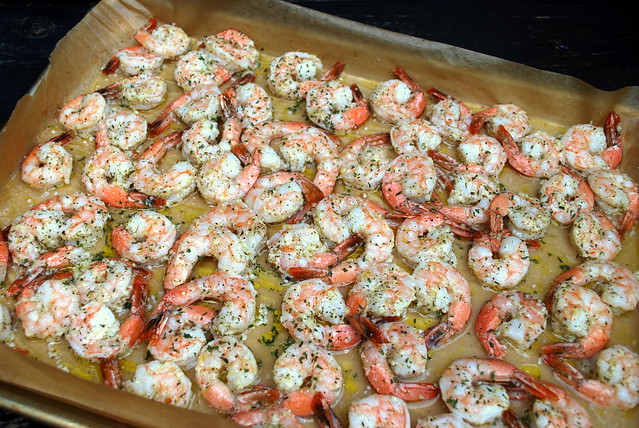
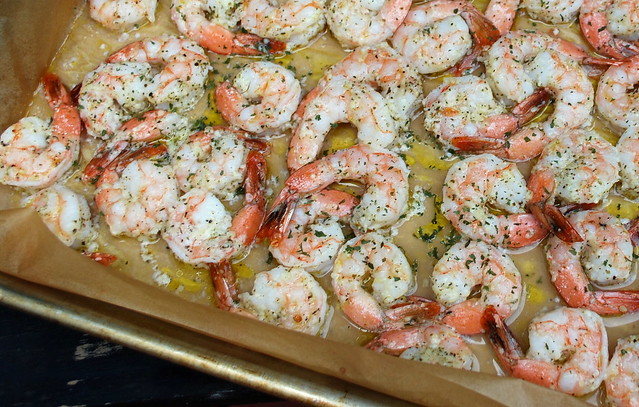
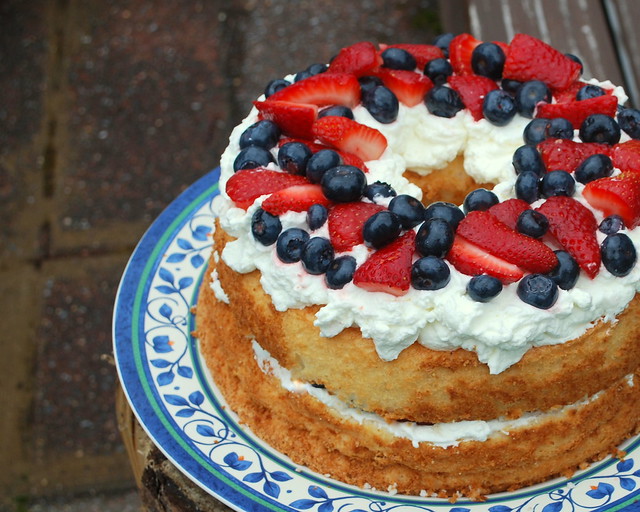
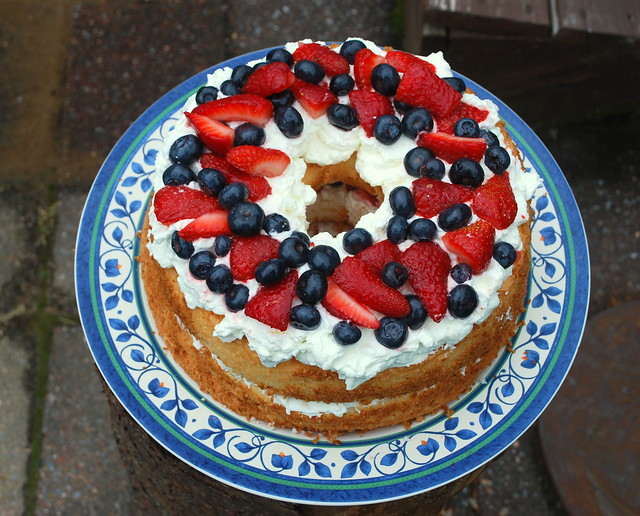
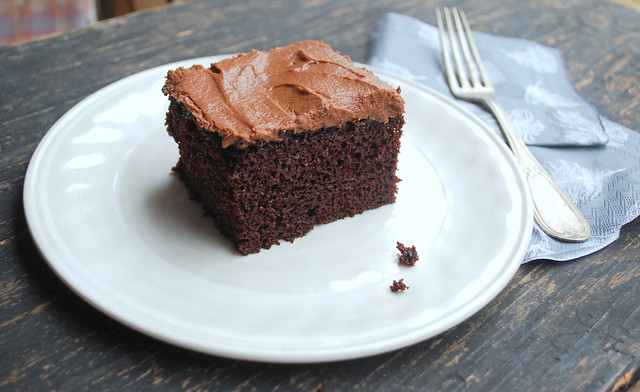
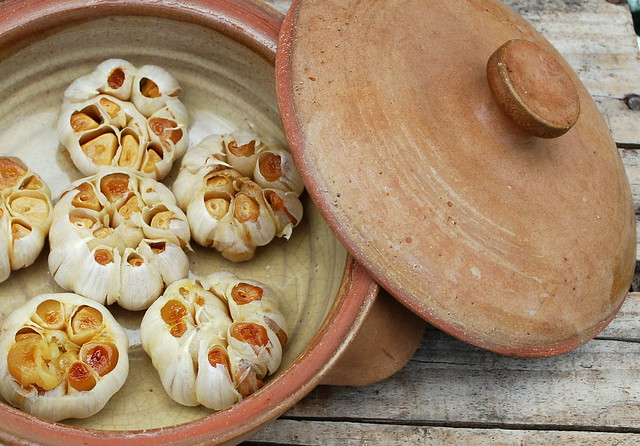
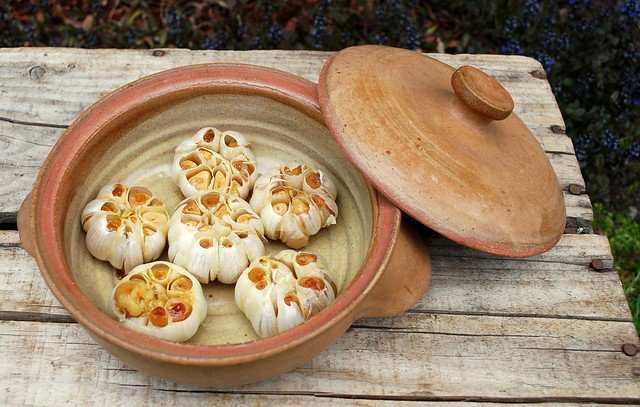
Fast forward to this month, and although I have horrible back pain which limits my mobility and my ability to stand for very long, I’m managing it. I’m finally able to get back in the kitchen and pick up my beloved camera which sat on the shelf for way too long. I’ll have new recipes coming very soon. I’ve missed this little blogging community, although I have still have been posting on my Facebook page and sharing recipes from the past it’s time to get some new ones going. So that’s where I’ve been and I’m so excited to be back.

I’m stable. I’m staying positive. I’m taking my life back little by little, one step at a time. I’d love it if you continued to join me on this new journey.

Wednesday, July 26, 2017

Oven Roasted Garlic Parmesan Shrimp

Shrimp Blog

Every July I have to tell new readers of the blog that I'm not around a lot in July. Summer doesn't last long here in New England and even thought it's my least favorite season, I appreciate the sunshine and all the yummy summer foods. I love working out in the garden and I love all the fresh seafood we get here in Rhode Island.

Shrimp is at the top of my list. We grill it a lot, but sometimes you need a fantastic recipe to get you through those long winter months when you can't go out and grill.

This is that recipe.

This is the only roasted shrimp recipe you will ever need.

I tinkered around in the kitchen and came up with this and it's just perfect. A hint of Parmesan, delicious olive oil and a dash of Italian seasoning! So good.

It got rave reviews from my gang.

Make sure to use RAW shrimp in this recipe. Cooked shrimp just won't cut it!

Shrimp Blog 1


Oven Roasted Garlic Parmesan Shrimp
recipe from Lisa@The Cutting Edge of Ordinary
PRINTABLE RECIPE
1 pound RAW large shrimp, peeled and deveined
2 tablespoons olive oil
4 cloves garlic, minced
1/2 teaspoon dried Italian Seasoning
1/4 cup freshly grated Parmesan
Kosher salt and freshly ground black pepper, to taste

Preheat oven to 400. Line a sheet pan with parchment or lightly spray with cooking spray. Place all the ingredients in a bowl large enough to hold all the shrimp. Mix all the ingredients together and place shrimp in a bowl. Toss shrimp to coat. Place into oven and roast just until pink, firm and cooked through, about 6-8 minutes (don't overcook!)

Friday, June 23, 2017

Berry Filled Angel Food Cake

Angel Food Berry Cake (7) blog


Now that the warmer weather has hit I'm sure there will be a few parties and cookouts to attend. Most of my friends and family make it pot luck and we all bring a dish. I usually opt for dessert cause I love making desserts. I don't always love making complicated desserts though. Sometimes I'd like to keep it simple. Simple doesn't mean it can't be delicious.

We decided to have a few friends over for dinner. No big, just throw some corn and steaks on the grill, bake a few potatoes, easy peasy. I wanted dessert to the be same way so I made this little beauty.

Angel Food Berry Cake (5) Blog

I made an Angel Food Cake but you can buy one from your local grocery store as well. I think the local stores produce really small cakes compared to making it yourself, plus, you know what you put in yours when you make it yourself.

Angel Food Berry Cake (4) Blog

Easy Berry Filled Angel Food Cake
recipe from Lisa@The Cutting Edge of Ordinary
PRINTABLE RECIPE
1 Angel Food Cake (I used this recipe without the sauce!)
1 pint fresh blueberries, washed
1 pound fresh strawberries, washed
16 oz  heavy whipping cream
5 tablespoons confectioners sugar (divided)
1 teaspoon vanilla extract

Bake the cake and let cool completely. Once the cake is cool, cut it in half horizontally. Remove the top portion and set aside. Using a sharp knife cut a little tunnel into the bottom layer of the cake. Use your fingers to pull some of the cake out. Don't cut too close to the edge.

Slice the strawberries into bite size pieces, add to a large bowl. Add in the blueberries and 2 tablespoons of confectioners sugar. Let the berries sit for 10 minutes.

Using a stand of hand mixer whip the heavy whipping cream on medium speed until it forms stiff peaks. Add in the vanilla. Whip for just 30 seconds more. Using a spatula, fill in the tunnel with the whipped cream and top with half the berries mixture. Place the top back on the cake and cover it with the remaining mixture. Place the remainder of the berries on top and chill until ready to eat!

Thursday, June 15, 2017

Sesame Ginger Dressing

Seasame Giner Dressing bLOG 3

I've been at it again. Tinkering with vinegars and oils and all things delicious in the kitchen.

I eat a big salad every day for lunch. Yes, every day. I know to some folks that might seem boring, but I mix it up and make a really delicious salad filled with all different kinds of nuts and veggies and fruits and it always contains 1/2 an avocado cause I'm kind of a wee bit addicted to avocado. I admit it.

I don't usually buy store bought dressing because I love making my own. It's so easy to make your own dressing and it' not loaded with preservatives and a buncha of stuff you really don't want in your body in the first place, so why not make your own right? Right.

My trusty transcriber Evan (my son) will often sit at the kitchen table while I shout out what I'm adding and how much until I get the perfect balance of tartness. That's another great thing about making your own, you make it the way you like it.

Grab a mason jar, throw a bunch of ingredients in it and make your own!

Seasame Giner Dressing blog 2


Sesame Ginger Dressing
recipe from Lisa@The Cutting Edge of Ordinary
PRINTABLE RECIPE
1/2 cup soy sauce
2 tablespoons red wine vinegar
2/3 cup rice vinegar
2 tablespoons fresh ginger, minced or grated
3 tablespoons honey
2 tablespoons sesame oil
1 cup canola or vegetable oil
salt & pepper to taste
1 tablespoons Asian seasoning (optional)

Put everything in a mason jar and shake! This makes a good amount so use a quart size jar.

Thursday, June 8, 2017

Simple One Bowl Chocolate Cake

One Bowl Choc Cake (11) blog 1

Contrary to what some people might think, I don't make sweets every week, sometimes not even one in a month.

If I go too long without making something sweet my kids will eventually start asking. "hey Mom are you going to make any cookies sometime soon" or I'll get Evan pointing something out in a magazine and saying "you could make that for me mama". Oh why thank you.

I'm happy to make sweets, but I admit it's hard to stay away from them when you have a sweet tooth like I do. So I don't make too many just for us, but I'm always happy to make them and take them (somewhere).

This chocolate cake was a "just because" cake. Sweet were requested and I didn't want to make a big mess in the kitchen so this One Bowl Chocolate Cake was on the menu.

I have to admit I didn't have any cake but I might have licked the spatula after I made the frosting. It smelled like chocolate fudgsicles.

One Bowl Choc Cake  blog

Simple One Bowl Chocolate Cake
recipe from Lisa@The Cutting Edge of Ordinary
PRINTABLE RECIPE
1 1/2 cups white sugar
1 3/4 cups all purpose flour
3/4 cup unsweetened cocoa powder
1 1/2 teaspoons baking powder
1 1/2 teaspoons baking soda
3/4 teaspoon salt
2 eggs
1 cup milk
1/2 cup vegetable oil
2 teaspoons vanilla
1 cup boiling water

For the frosting: 
3/4 cup unsalted butter (room temp)
4 tablespoons unsweetened cocoa powder
2 1/2 cups powdered sugar
1 tablespoon or more milk

Preheat your oven to 350.

In a large bowl, whisk together the sugar, flour, cocoa powder, baking powder, baking soda and salt until well combined. Add the eggs, the milk, the vegetable oil and the vanilla, and whisk these ingredients into the dry ingredient until the mixture is smooth. Slowly add the boiling water, whisking constantly until the cake batter is runny and smooth.

Pour the cake batter into a greased 9­x13­ inch rectangular pan and bake at 350 degrees 
about 30 minutes or until a toothpick inserted into the middle of the cake comes out clean.

Let the cake cool in the pan on a wire rack while you make the frosting. For the frosting, whip the butter on high speed using a stand mixer or electric hand mixer until the butter is
pale and smooth. Add the cocoa powder and the powdered sugar and continue to whip until smooth. If frosting is too stiff, a teaspoon or 2 of milk to loosen up the frosting until it reaches a consistency that is spreadable. Spread on cooled cake.

Friday, May 19, 2017

Roasted Garlic

Roasted Garlic blog 2

I don't know if everyone knows this about me but I'm a yard saler. You might call them tag sales, or garage sales, or even car boot sales as they call them in England. Once the nice weather hits here in New England my husband and I have our ritual. I go over the local paper Friday evening, writing down which ones we'll hit in order of time and distance. I grab my "yard sale" change purse, my cross body bag and off we go.

I love all things vintage. I'd much rather find that perfect piece of antique furniture and restore it myself before I'd buy something new.

We hit one particular yard sale and the first thing we noticed were the huge trees in the yard. I mean these suckers were massive. I snapped a pic with my cell phone.

Old Tree

We started talking to the elderly couple and the wife told me that she has lived on the land her whole life. She was raised in the farmhouse out back and bought the house they were in now for $1 from her grandparents. She told us she had the local college come to try and age the trees but the drill bit wasn't long enough. University of Rhode Island estimated that they were somewhere between 500 - 600 years old! Isn't that amazing?

We chatted away with them while I browsed around the garage and spotted a beautiful piece of pottery. I scooped it up the moment I saw it. Arthur Lavoie, the homeowner told me that he made it back in 1975. Sure enough when I flipped the pot over, there were his initials and '75 etched in the back. I asked if he was a potter and he said "no just a tinkerer" and I thought what a great thing to identify as. A tinkerer. I said "Arthur, I'll think of you every time I use it and Mrs. Lavoie said "oh how sweet". I love yard saleing, but I think I love the people and the stories I hear even more.

So I bought that beautiful pot from Arthur and I came home and I immediately roasted garlic in it cause roasted garlic don't need no reason.

Here's to old trees, sweet people and tinkerers everywhere.

Roasted Garlic blog

Roasted Garlic
recipe from Lisa@ The Cutting Edge of Ordinary
PRINTABLE RECIPE

Full heads of garlic
olive oil

There really is no recipe I roast garlic like this quite often. It's great in sauces, smeared on crusty bread, added to sandwiches, in masked potatoes, stirred into soups, in salad dressings. It's just good stuff. Roasting really mellows the flavor and gives it a real earthy, nutty taste.

Oven to 350. Place the garlic heads in a ceramic pan, or you can just place them in a pie dish that you cover in aluminum foil. Chop the tops of the garlic off and drizzle a bit of olive oil into the center so it falls down into the cloves. Top it with a cover or cover with aluminum foil. Bake 25 mins then uncover and roast for another 10 - 15 minutes or under the cloves get soft and mushy. Let cool enough to touch then squeeze those babies out into a jar and keep refrigerated until you are ready to use them.

Wednesday, May 10, 2017

Pickled Eggs

Pickled Eggs blog

I love almost all thing pickled! I'm not a fan of beets so I'd have to say those are out, but pretty much everything else that can be soaked in vinegar is a win for me.

We eat a lot of eggs in this house. I'm talking like 4 dozen a week. I hard boil them for the week and we eat them for breakfast AND I pickle them for snacks! A pickled egg is a wonderful little snack. They are also great chopped on a salad or added to a tuna sandwich.

Pickled eggs blog 2

I often add some onion to mine but I have picky eaters in my house who are not fans of onions so I left them out of this batch. If your craving pickled onions, I have a great recipe for Quick Pickled Shallots. They are also a great addition to a salad and oh so yummy! Click here!

You can certainly half this recipe if a few dozen eggs is too much for you. They do keep nicely in the fridge for about a month though.

Pickled eggs blog 3

Lisa's Pickled Eggs
PRINTABLE RECIPE
24 hard-boiled eggs, peeled
1 large empty sterilized glass jar
4 cups apple cider vinegar
2 tablespoons kosher salt
1⁄3 cup sugar
1 tablespoon pickling spices

Hard boil 24 eggs and place them in a large glass sterilized jar. Bring all the ingredients to a boil in a saucepan. Pour over eggs. Allow jar to come to room temperature then refrigerate. Recipe can be halved.