Monday, September 28, 2009

Proscuttio Pinwheels

Proc Pinwheel CU1

Talk about easy.

This is one super easy recipe.

I popped these into the oven last Sunday while my husband was watching his beloved Steelers. My husband is a die-hard football fan. He anticipates football season the way a little kids anticipates Christmas. So when his team is on and he can actually see the game here in RI, I like to make him some football treats.
I scored big with this recipe. Get it scored, football, oh never mind.

I found this recipe in a magazine I received called Simple & Delicious. I don’t know how I got the magazine, but it was in my mailbox so I scanned it over and saw quite a few delicious possibilities. I decided to start out with these.

When these came out of the oven, I put one on a napkin, handed it John, warned him it was hot and walked back into the kitchen. One minute later he walked into the kitchen and said:

“Whatever those are, I hope you made a whole lot of them”.

So needless to say, he liked them, he liked them a lot.

Proc Pinwheel

I doubled this recipe and they were all gone within a half hour or so. The kids loved them too.

I might try this with some thicker sliced ham next time. I’m going to warn you right now, one package of the puff pastry will not be enough. You really should double this recipe if you make it.
It's just so damn good.

Prosciutto Pinwheels
Printable recipe
Yield 20 appetizers (we doubled the batch and got 28, this recipe is for 1 batch)
1 sheet frozen puff pastry, thawed
¼ cup sweet hot mustard (I used Dijon)
¼ pound prosciutto or deli ham
½ cup shredded Parmesan cheese (I used grated cause I was out of shredded)

Unfold the puff pastry and spread it with the mustard. Leave a ½ border when you are spreading the mustard. Lay the proscuitto and cheese over the mustard. Roll up one side to the middle of the dough: roll up the other side to the middle so the two rolls meet in the center. Using a serrated knife cut into ½ inch slices.

Place on greased sheet (or parchment lined sheet). Bake at 400 for 11 – 13 minutes or until puffed and golden brown. Serve warm.
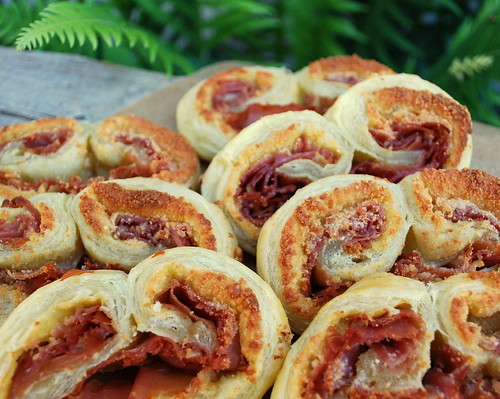
Proc Pinwheel CU

Friday, September 25, 2009

Grated Apple Pie with Streusel Topping

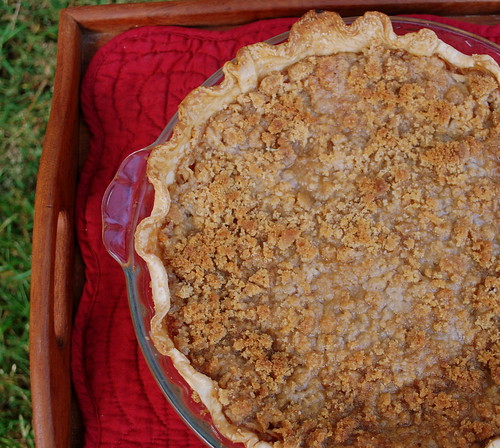
Grated Apple Pie in tray 1


The apple recipes continue.

Grated Apple Pie. Yes you read that right. Grated. When I first saw this recipe I thought, how strange to grate the apples for pie, but as I read it and thought more about it, it made sense. Grated apples would cook quicker and probably be almost strudel-like. Strudel yummmm, that word alone makes my mouth water, so I thought, oh yeah, I must make this pie, and I did.

I made this Wednesday night. Yesterday my friend Tati and I had gone shopping all morning. We were both in need of some retail therapy. After we unloaded all the bags, we dug into this baby. I'm always hesitant when I'm trying a new recipe. I've had some failures over the years but this one didn't disappoint.

Tati thought it was better than my apple pie
or my apple pan tart (which is my personal fave). Pie for lunch.

It was great.

Grated Apple Pie in tray

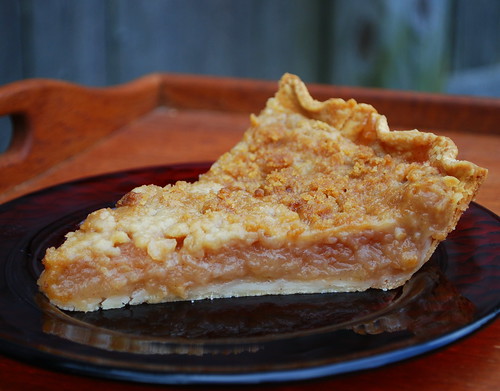
Thanks to my foodie friend Kathy for this recipe. She's the one who found it and passed it on to me and am I ever glad that she did. This really was like a strudel pie. When I first took it out of the oven I thought oh no, it's going to be goopy and mushy, cause it looked a bit wobbly, but once it cooled, it was perfect

Grated Apple Pie with Streusel Topping
Printable recipe
1- 10 inch unbaked pie shell
(you know me - little red box never lets me down)
6 medium apples, firm and crisp
½ cup granulated sugar
2 tablespoons unsifted, all purpose flour
1 tablespoon lemon juice

Streusel Topping

½ cup unsifted, all purpose flour
¼ teaspoon ground cinnamon
1/8 teaspoon salt
½ cup firmly packed light brown sugar
2 tablespoons butter, softened to room temperature

Peel, core and coarsely grate the apples with a box grater. Mix the apples with the granulated sugar, 2 tablespoons of flour & lemon juice. Set aside.

To make the streusel topping: Combine the brown sugar, flour, cinnamon and salt. Press out any lumps with your hands. Cut in the butter until the mixture is crumbly.

I just used my hands to crumble it.


Grated Apple Pie slice

Spoon the apples into an unbaked pie shell and top with the streusel topping.

Bake at 400 for 10 minutes and lower the oven to 375 and bake for 25 to 30 minutes longer, or until the filling is bubbly and topping is browned.

Notes: The original recipe called for unpeeled apples. I peeled mine. If you think your apple skins are on the thinner side you could leave the peel on.

You don’t need to core or quarter the apples either. After I peeled mine I grated them whole on the box grater. I just grated each side till I reached the core, turned and repeated until the whole apple was grated. It was easy.

Just watch your knuckles!

Grated Apple Pie - cores

Thursday, September 24, 2009

GARLIC!

I love garlic!

I love garlic almost as much as I love chocolate or nutella,
or fresh crusty bread, or my Mom's artichoke omelettes.

I said almost.

Loving garlic more than chocolate, well that's just crazy talk.

But I do love it. In fact I love garlic so much that when John and I were first starting off in our relationship,
one of the first food related questions I asked him was "do you like garlic?".

Luckily his answer was yes, cause if it was no,
I'm not quite sure what I would have done.

A life that would hamper my love of garlic? I can't imagine it. I guess I was pretty lucky he was a garlic lover.

This year I ordered a garlic sampler from
Gourmet Garlic Gardens. I found them through a fantastic gardening blog called Chiots Run.

I choose the medium flavor assortment. Here's what I got:

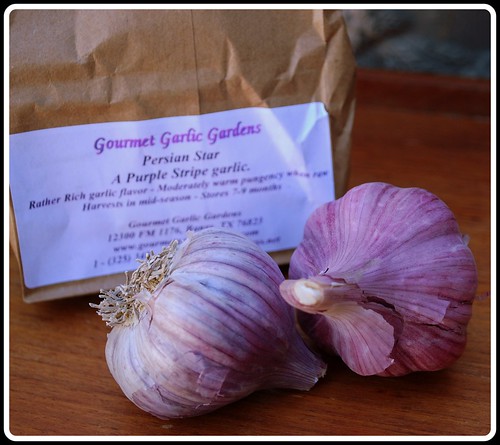
Persian Star - This smelled so good I wanted to chop up a clove and start cooking immediately.

Garlic Persian Star

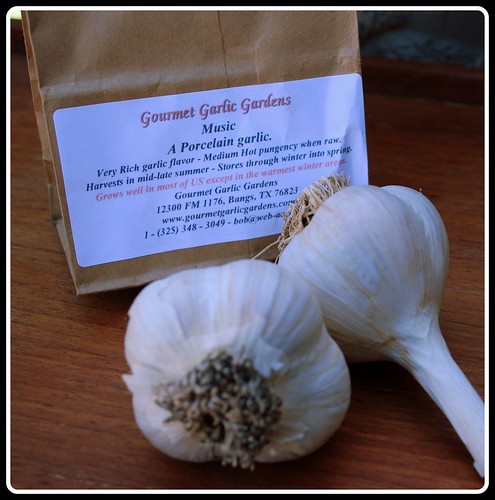
Music
- the biggest and baddest of them all. The cloves were huge!

Garlic Music

Chesnok Red - this was so pretty it was kinda of a shame to cover it up with dirt.

Garlic Chesnok Red

Purple Italian Rocambole - hey it's Italian, so it's gotta be good.

Garlic Purple Italian Rocambole

The folks at Gourmet Garlic Gardens really know their stuff.

They mail you the garlic when it's time to plant it in your area.

You get 2 pages of instructions - 1 to explain how to plant the garlic, and 1 that explains how to harvest when it's time.

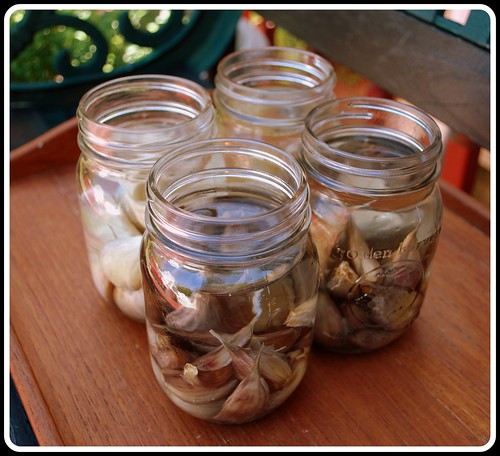
First the garlic gets a soak overnite in a baking soda/water mixture.

This looses up the skins.

Garlic in jars

Then you soak them for 3 - 5 minutes in rubbing alcohol
right before they go in the ground.

The alcohol kills pests and any eggs or pathogens the first soaking missed. Then you are ready to plant.

Here in RI I was instructed to plant the cloves 4 inches deep and 6 inches apart.

Garlic planting

Mitch was my garlic planting helper for the day.

I told him that I would be sure to let all my blog readers know that
the hands you see here are Mitchells.

Please not how soft and subtle they look and how perfectly manicured they are. Mine were caked with dirt. I'm just sayin'.

Garlic planting 1

Once all those little cloves of goodness were in the ground,
we mulched them with leaves and grass clipping,
which gave Mr. Softy Hands the sniffles (sorry Mitchyboy!).

Garlic Planting 2

The only bad part of growing your own garlic....the waiting!
These beauties will be harvested from June till early Fall.

That leaves me a lot of time to find the best garlic recipes.

Pssst...more apple recipes coming up!

Tuesday, September 22, 2009

Orchard Applesauce

Applesauce in bowl1

Sunday was a busy day.

The kind of day that was just one project after another.

The kind of day that leaves you tired, but tired in a good kind of way. You know when you finish the day and your feet hurt and there's dirt under your nails and bugs in your hair and your face is flushed with a pink glow cause you've spent most of the day in the sunshine?

That's the kind of Sunday I had.

I decided to make some homemade applesauce early in the morning. The whole house smelled of cinnamon and apples. That is the smell of autumn to me.

I harvested the last of my basil and eggplant. I pulled the last of the tomatoes off the vine to ripen on the windowsill. Evan and I cleared the raised beds and weeded them one last time.

We replaced the dying impatients with mums. We pulled withered leaves and flowers from the pots. We sat by the fig and admired how big it's gotten over the summer, dreaming of the figs we'll eat next year, knowing soon it will be bundled in a blanket and placed in the shed to go dormant over the winter.

Mitch helped me plant lots garlic for next years harvest and mulched the beds to give it a nice warm place to grow. More garlic info on an upcoming post.

I cooked up some jasmine rice while John got ribs ready to go on the grill.

By the time dinner was ready, we were all hungry and tired and thankful for the simple meal before us.

Applesauce CU

This is a simple applesauce recipe. All you need is 8 apples and a few other ingredients and you have delcious homemade applesauce that puts the stuff in the jar to shame.

Just to tell you how good this applesauce is....Evan won't eat applesauce that you can buy at the megamarts, but he loves my applesauce cause honestly, it's just that good.

When the apples have cooked down just mash them up to the consistency you like. We like ours with a few lumps.

Applesauce with spoon1

Orchard Applesauce
adapted from a recipe in Yankee Magazine
Printable recipe
8 medium size apples (I used a combination of Cortland and Macoun).
1 cup apple cider (apple juice would work too)
½ cup granulated sugar
½ teaspoon ground cinnamon

Peel and core the apples and cut into hunks. I put my apples through a corer/peeler/slicer machine, but if you don’t have one a knife will do the job just as well. Place the apples in a medium size saucepan and add the remaining ingredients. Cook until it comes to a boil and then turn the heat down and let it simmer for 15 – 20 minutes. Let it cool for about a half hour or so then take a potato masher and mash it to the consistency you like. Cool to room temperature then cover and refrigerate.

Monday, September 21, 2009

Apple Picking '09

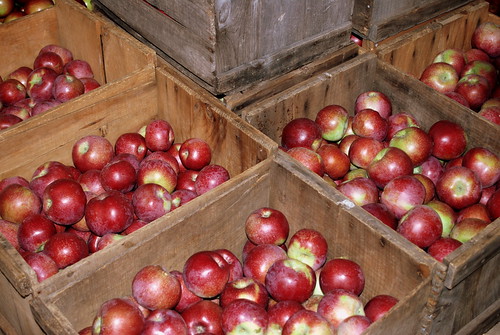
Apple Picking abundance


Every year we head up to North Scituate to pick apples at Sunset Orchards. We've been going with John & Tati since the boys have been babies. Then Sara came along a year later and she joined the crew too.

This year John P and Jesse didn't go with us. John P was busy working and Jesse wasn't feeling so great so he chose to hang at home. We brought him home apple cider, which he loves, so he was just as happy lazing about and still getting his cider fix.

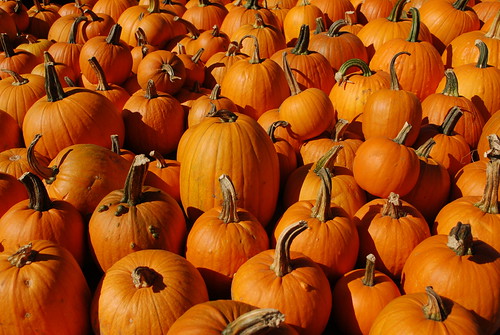
Because of all the rain we had this summer, the apple crop this year was amazing. I've never seen so many apples on one tree. The orchard also has peaches and pumpkins too.


Apple Picking Pumpkins

We were there for these babies.....


Apple Picking apples in big bin


Apple Picking Evan


Sara demonstrates the two fisted eating method.

Apple Picking 2 fisted apple eating - Sara


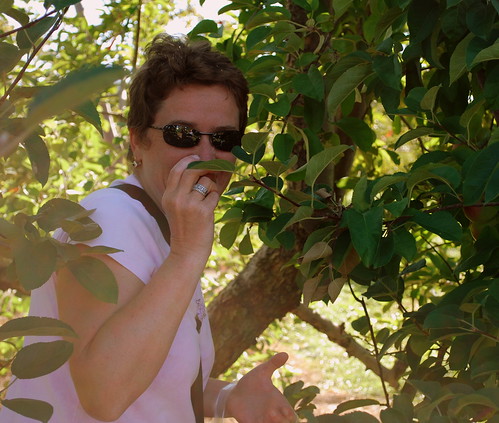
Tati likes to eat hers hiding inside the apple tree.


Apple Picking Tati hiding and eating

Evan likes to channel Popeye while he's eating.

Apple Picking Evan Popeye eating apple

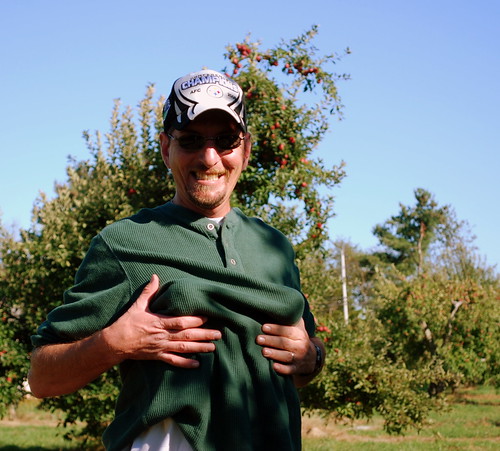
John likes to act like he's 12 again.

What is it with men and boobs??

Please don't answer that.

Apple Picking John or 12 yr old boy

Evan must constantly make goofy faces.....

Apple Picking Evan with goofy face


..and Sara delights in joining him every chance she gets.

Apple Picking Sara Evan under tree


Apple Picking Tati with apple on display


Apple Picking Sara apple in mouth


Apple Picking on tree

After all the goofines was over, some actual apple picking took place.

Apple Picking John and Evan with poles


Apple Picking Tati handful


Apple Picking bag

We picked 25 pounds.

Tati & Sara picked 35.

Apple Picking haulin home

I don't think I even have to tell you to prepare for some apple recipes.

Apple Picking 1

Friday, September 18, 2009

Ribeye Steak with Onion Blue Cheese Sauce

Rib Eye with Blue Cheese Onion plated 1

Here’s a little fact a lot of you might not know about me. I didn’t eat meat for over 20 years. It’s true. I was a vegetarian for most of my young adult life. I won’t go into the many reasons that I became a vegetarian, but it did have something to do with a man named Paul McCartney and his then wife Linda.

So I was meatless for a long, long time.

Fast forward to 1995, I’m pregnant with my first child and the doctor is worried about the amount of protein I’m getting. I promise him I’ll bulk up on the protein. A few months pass, I develop gestational diabetes, I’m bed ridden for the last few months of the pregnancy, Jesse is born in respiratory distress, and he’s a little guy. Barely 6 pounds. He’s a terrible sleeper. Mama is exhausted.

Fast forward again, less than a year later, and I’m pregnant again. Doc and I have the same conversation about protein.

He jokingly writes me a prescription that says “EAT SOME FISH”. I tell him “I love fish, if you tell me I have to eat it, I will”. “Then eat it.” he says. So I do. I start to eat fish in 1996. Evan is born in October. He’s almost a 9 pounder. He sleeps through the night almost from the get go. Not taking into consideration that I have 2 boys in diapers and drinking from bottles (I changed a lot of diapers and made a lot of bottles over those years) I think I’m in heaven. I’m almost getting a full night sleep. I’m still not eating meat.

Fast forward for the last time. We are in Disney in 2006. We go to a luau. I have now decided that I’m going to try to eat a little chicken. It looked so good and smelled so delicious. I take a bite.

“Oh my God, this is the best chicken I’ve ever had”.

Was it because I hadn’t eaten it in so long?? Was it the way it was prepared???

It was so good. I ate one piece, then another, then another until John finally looked at me and said

“That’s pork you’re eating you know?

What? Pork? Me? How could have eaten pork?

I haven’t had pork in almost 25 years. I ate the pork.

I finished all the rest of it on my plate.

I crossed the line.

I was a carnivore again.

I liked pork.

I really liked pork.

So that’s the point in time that I was no longer considered a vegetarian. I still enjoy lots of meatless meals, but chicken and pork and beef have passed through my lips many, many times. Red meat took quite a lot longer for me to consume. I still can’t eat it rare or even medium rare and I don’t eat much of it, but I have to say, when it’s cooked right, I do enjoy it, carnivore that I am.

This is a Pioneer Woman recipe. PW is coming out with her own cookbook next month. If you like down home cooking that’s not fussy or fancy I urge you to buy her cookbook. She really does have some great recipes, and here’s one of them.

Let me tell you. I salivated when I saw this sauce on her site. Yeah the steak looked ok too, but that onion blue cheese sauce had me, onion freak that I am.

Be patient with the onions.

Good caramelized onions take time, but are so worth it.


Rib Eye with Blue Cheese Onion

Then you add the cream and the beautiful blue cheese and all is right with the world. At least until you finish this meal.

Rib Eye with Blue Cheese Onion plated


P Dub's Ribeye Steak with Onion Blue Cheese Sauce
Printable recipe
2 ribeye steaks (we grilled outside)
2 tablespoons butter
Salt
Pepper
4 tablespoons butter
1 very large yellow onion
3/4 to 1 cup heavy cream
1/2 cup crumbled blue cheese
Salt and pepper both sides of the steaks.

Saute onions in 4 tablespoons butter over high heat. Cook for 5 to 7 minutes, or until dark and caramelized. Reduce heat to simmer and pour in cream. Cook for 3 to 5 minutes, or until reduced by half. Stir in blue cheese until melted. Serve steaks on generous portion of sauce. Faint.

Repeat as often as needed.


Rib Eye with Blue Cheese Onion empty pan


I could have licked that pan clean but I didn't.

I do have a tiny ounce of control left.

(but I so wanted to!)

Tuesday, September 15, 2009

Chocolate Chip Cookie Cake

This is a cake that the kids went crazy over.
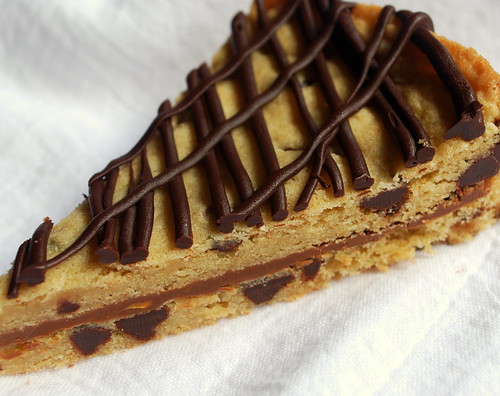
What kid wouldn’t love a giant 2 tiered chocolate cookie with a chocolate layer in the middle, topped with chocolate drizzle.

Wait, what adult wouldn’t love it either?

Chocolate Chip Cookie Cake spreader

Last weekend I planned a very last minute dinner party. I didn't really have a dessert in mind so off I went to do a food blog search. Seeking inspiration I asked the kids to name a few things they love when it comes to dessert and Jess yelled out "CAKE". A few seconds later Evan said "CHOCOLATE CHIPS". I popped cake and chocolate chips into the blog search and found
this on a blog called Slice of Sueshe.

Chocolate Chip Cookie Cake.

Chocolate Chip Cookie Cake WS

Isn't it scrumptious looking?

I adapted the recipe a bit and filled the middle with chocolate/caramel chips.

I would have loved to have filled the center with Nutella, but we were out. This is a really sweet dessert, so slice thinly! A little goes a long way!

Chocolate Chip Cookie Cake
Printable recipe
Adapted from a recipe by Slice of Sueshe
1 ½ cups all purpose flour
½ teaspoon baking soda
1 stick butter, room temp
½ cup & 2 tablespoons granulated sugar
½ cup & 2 tablespoons light brown sugar, lightly packed
¼ teaspoon salt
1 teaspoon vanilla
1 large egg
1 cup chocolate chips or chocolate chunks

Filling
1 cup chocolate/caramel chips
1 teaspoon vegetable shortening

Preheat the oven to 350. Spray two 8 or 9 inch round cake pans, set aside.

In a medium bowl sift or whisk the flour and baking soda, set aside.

Cream together the butter and the sugar, until it turns pale yellow in color (about 2 minutes). Add in the sugars, salt and vanilla. Cream until smooth. Add the egg and beat on low until incorporated. Stir in the chip or chunks.

Divide the dough between the two cake pans. To get even dough amounts I weighed the dough then split it in half. Pat the batter into the pans. I let my batter come it just about a ½ inch from the edge. Bake for 15 – 18 minutes.

Allow to cool completely.

Filling: Pour the chips and shortening into a microwave safe bowl. Microwave in 30 second intervals just until the chips are starting to melt. Spread chocolate mixture onto cooled cake bottom and top with second cookie.

I microwaved about a half cup of the chips and put them into a plastic zip lock bag with the tip snipped off so I could drizzle the chocolate over the top cookie.

Chocolate Chip Cookie Cake TS

The kids were raving about this cake. One of the neighborhood kids came over while our gang was half way through this dessert and you should have seen her eyes when she saw it.

"What is that??" she said

Every one of the kids, mouths filled with cake, answered her very enthusiastically

"It's 2 giant chocolate chip cookies, with chocolate inside, and it's a cake!!"

They were so funny.

"Oh my God, that is the best dessert idea ever" she said.

You know what, she was right.
Chocolate Chip Cookie Cake CU

Saturday, September 12, 2009

Biscuit Topped Chicken Stew (using a rotisserie chicken)

Biscuit Topped Chicken Stew CU w fork

As soon as the air turns a bit chilly here I am ready for some hearty meals. My grill went into overdrive for the past few months. August was hot and humid here so my stove got quite the rest. This past weekend ushered in some cooler temps and had me aching to get baking (that's coming) and cooking.

I call this a stew cause it's a bit too loose to be a pot pie. I made some biscuits and placed them in the bottom of a dish and served the stew over the biscuits. If biscuits aren't your thing you could always use noodles or rice. It would be great with either.

I use a store bought rotisserie chicken when I make this. I just pick all the meat off the bones and viola, it gives me just enough chicken to make this stew. Add in whatever veggies make you happy.

You really can't screw this up!

Biscuit Topped Chicken Stew
Printable recipe
Meat from 1 rotisserie chicken
1 small onion, chopped
10oz (1 pkg) baby bella mushrooms
Extra vegetables of your choice
2 cans (10oz) cream of mushroom soup
1/2 cup milk
1 1/2-cup cheddar cheese, shredded (divided)
2-6oz. cans Pillsbury Homestyle biscuits (6 count, small tube)

Remove all the meat from your rotisserie chicken.

Place it in a big bowl and set it aside.

You can use any kind of veggies that float your boat for this recipe. I always raid the fridge and freezer and see what I have.

If you are using any fresh veggies such as broccoli or carrots you should steam them a bit first. Make sure you cut any of the bigger pieces into bite size ones, and don’t steam them to death, remember they will all be going back into the oven to cook. Add the veggies to the bowl of chicken.

Biscuit Topped Chicken Stew CU1

I put approximately a tablespoon of olive oil back into the same pan and added a small chopped onion. I let the onion get tender and then I threw the mushrooms in. I used one package of baby bellas. I cut all the mushrooms in half. Once the mushrooms have cooked down, add them to the bowl. My favorite carrots to use in a pot pie are Le Sueur Whole Baby Carrots (15oz, in the silver can). They are perfect size for pot pie and you don't have to do any cutting or chopping, just throw the whole can it. I usually throw a good handful of frozen peas into the mix right before it goes into the oven. No need to defrost them.

The last veggie I used a large potato. I boiled it until I could stick a knife in it easily, then let it cool, peeled and chopped it into a small dice. Into the big bowl it goes.

Now for the glue that holds all those veggies together. I use 2 cans of cream of mushroom soup and milk. You can use any of the “cream of’s” that you like, but I find the cream of chicken is too chickeny for this recipe and the cream of celery really doesn’t do anything for it. Pour the soups into a bowl and mix it with the milk. Add in 1 cup of shredded cheese and mix well. Pour this over your chicken & veggies. Mix well, and pour into a lightly greased casserole dish. I used a nice deep dish. A bit smaller and deeper than a 9 x13.

Biscuit Topped Chicken Stew

Topping *
Remove your biscuits from the cans and place them on a sheet of parchment or wax paper. Cut each biscuit into 8 little triangular pieces (cut it in half, then cut in each half in half again, got it? You should have 8 pieces from each biscuit.) Place the biscuit pieces on top of your chicken mixture covering as much of the top as you can. Sprinkle the remaining ½ cup of shredded cheddar.

Bake for 25 minutes or until the biscuits are browned and cooked through. Cover with foil to prevent the biscuits from browning too much. Bake an additional 15 - 20 minutes, or until the filling is hot and bubbly. Let stand for 15 minutes before you cut into that bad-boy.

*I got the idea for this topping from the blog
Picky Palate (thanks Jenny!) . I followed Jenny's directions and used 1 can of the biscuits, but when I make this in the future I will use 2 cans as this recipe states. 2 cans gives you better biscuit coverage.

Biscuit Topped Chicken Stew CU

Wednesday, September 9, 2009

Oat Nanner Clusters

Oat Nanner Cluster CU in bag

I found a great blog called
Sprouted Kitchen. If you want to see some of the most beautiful food photography I’ve come across on the web, you should check out her site. If you want to see even more breathtaking wedding photography, done by the guy who takes all the breathtaking food photos on Sprouted Kitchen, click here: Hugh Forte Photography. He is amazing. I sent him a comment and told him “you make me want to get married all over again so you could come take our pictures”.

Sara has lots of great, healthy recipes on her blog. I’ve already got of list of the things I want to make. I started off with something sweet, huh, imagine that, me making something sweet. Wonders will never cease!

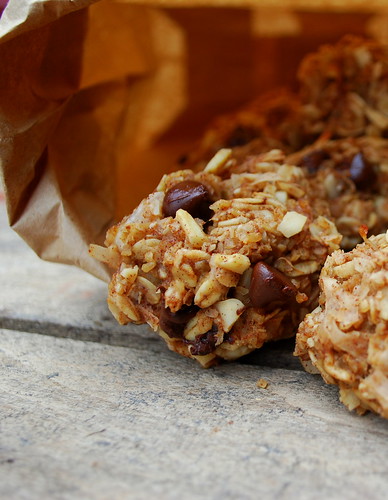
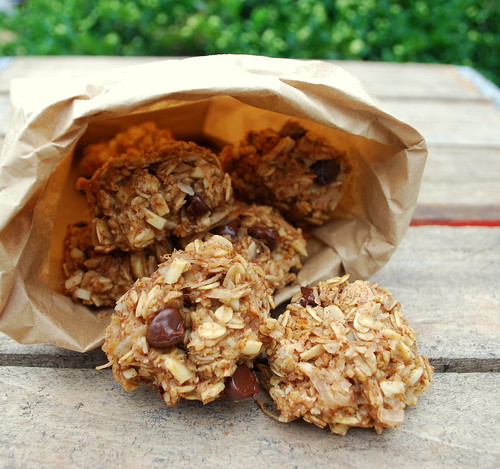
Saras recipe was called Oat’Nana Pucks. I changed it to Oat & Nanner Clusters, cause well honestly; my creation came out looking more like a cluster than a puck. No matter the shape, they were no less than delicious.

Oat Nanner Clusters LS

Oat & Nanner Clusters
From Sprouted Kitchen – This recipe contains no eggs, sugar (almost – see coconut note) or butter, but still tastes great!
Printable recipe
3 well ripened bananas
2 tablespoons good vanilla extract
¼ cup coconut oil (olive oil will work fine)
2 cups rolled oats
1/3 cup wheat bran
2/3 cup finely chopped almonds
½ cup unsweetened coconut (I never have unsweetened on hand, I used sweetened)
1 tablespoon cinnamon
1 teaspoon salt
1 teaspoons baking powder
¼ cup semisweet chips or carob chips

Oven to 350. Mush the bananas with a fork. Mix the wet ingredients together (bananas, vanilla and oil). In another bowl mix the remaining dry ingredients. Add the dry to the wet and gently mix. Fold in the chips. The dough will be loose. Just really squish it in your hands to ball it up.

On a baking sheet with parchment paper or a silpat, make mini balls, then give them a gentle smush to flatten them out. They really don’t change space while baking so spacing 1” in between each is fine.

Bake for about 14 minutes or until firm. Do not undercook or they will crumble.

Hoard (that was Sara’s comment, lol)

I substituted wheat germ for the wheat bran, cause that’s what I had on hand. I also used sweetened coconut because again, there is no unsweetened coconut to be found in this house. I’m sure my version came out a tad bit sweeter than Saras, but that’s ok, cause that’s what taking a recipe and tweaking it and making it your own is all about.

I loved these. They were almost like having a chewy bite of granola all rolled up into a sweet little package. I took these little clusters into work and they were happily gobbled up in a flash. My co-workers love me.