Thursday, January 31, 2013

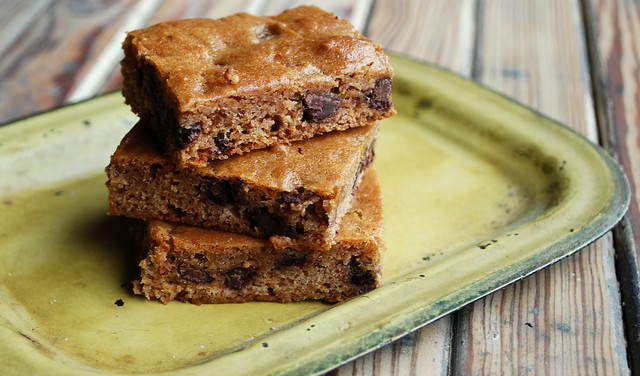
Spicy Chocolate Chip Fig Bars

Spicy Chocolate Fig Bars

First of all I want to thank all of you who gave me words of encouragement and kindness when I had a bit of a meltdown earlier in the week.

I need to stop comparing myself and this blog to others. No good can come from it, this I know.

Sometimes you just get caught up in what so-and-so is doing and it can leave you feeling a little less than adequate.

I had to think back to what the name of this blog means. The Cutting Edge of Ordinary. The ordinary that keeps us together. So many of you hit the nail on the head when you said "we like that you're not one of those big time, impersonal bloggers". I know I'm not in the same league as they are and you know what?..... I don't think I will ever want to be. I needed you all to remind me that right here is where I wanna be, with my little blog and my less than perfect photos with my tried and true recipes, being there for my boys (men), working hard so they can have the best possible life I can give them and hopefully showing them a way of life that they will cherish and look back on with happy memories. Of course the most important part of writing this blog is the person reading you. YOU. The reader. My faithful following of unbelievably wonderful people and a few very good friends who I can always count on to bring me back to reality and to show me how much you really do care for me and this little space on the Internet. I am so grateful for you all.

So I don't have time to work on a recipe index (I'd love one though) and I don't have time to get someone to re-vamp the blog or promote it like I should, and I don't have companies banging down my door asking me to try their products, but I'm here and I'm trying to bring something to you when I can and if you come here and smile at something I wrote, or liked a photograph I took or made a recipe I posted and fed your family with it, or brought a dessert to a party from a recipe your found here and it got rave reviews, I have done my job.

That's all I need. I realize I'm not one to be fancy and sugar coated. I'm just me and I'm right here with you as long as you'll have me along for the ride.

Thank you my friends for helping me to see that I'm just where I need to be.
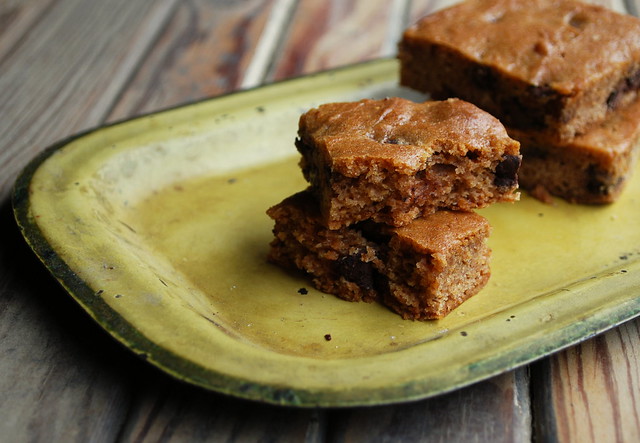

Spicy Chocolate Fig Bars 1

Now on to something sweet.

I found this recipe in Taste of Home magazine. I have to confess, I tweaked the hell out of it. It was originally called Orange and Fig Bars and it was made with....are you ready for this....orange cake mix. YUCK! I can't even being to tell you how disgusting that sounds, never mind might taste. I liked the idea of the fig preserves that were used instead of sugar so I went with it and substituted spice cake for orange and chocolate chips for walnuts.

The result - a spicy almost hermit like bar. I brought them into work and shared them as a breakfast treat and they were a big hit.

Spicy Chocolate Chip Fig Bars
yields 3 dozen
heavily adapted from a recipe at Taste of Home.
1 package spice cake mix (18 ¼ ounce)
1 jar fig preserves
½ cup canola oil
1 egg
1 cup semi-sweet chocolate chips.

In a large bowl combine the cake, preserves, oil and egg. Beat on low speed until blended. Stir in the chocolate chips. Batter will be thick. Spread into a 9x13 inch greased baking pan.

Bake at 350 for 30 to 35 minutes or until a toothpick inserted into the center comes out clean. Cool completely on wire rack. Cut into bars and serve.

Monday, January 28, 2013

Hot Sweet Onion Dip (and a bit of a rant)

Hot Sweet Onion Dip 1

I recently visited an amazing blog filled with gorgeous photographs and wonderful recipes.

I marveled over the sheer beauty of this blog.

I scrolled through page after page of perfection. One gorgeous photo after another. One delicious looking recipe after another. Every other day a new recipe. I was so impressed. Then I read the about page:

Author-Baker-Cook-Photographer... and oh yeah one more little tid bit....she is a resident physician! Wait it gets better...with 2 toddlers!

How? How can this be? It just boggled my mind. Where does this woman find the time? Seriously? I work full time outside the home. 45 hours a week. I put a hot meal on the table every night, I cook and bake on the weekends and try to take a photo in the small amount of natural sunlight that the New England skies offer during the winter months and I'm lucky, if on a good week I post 2 things.

How does she juggle being a doctor, raising toddlers and food blog all at the same time? I can't fathom it. I really can't. I griped about it on Facebook and got some funny responses. How does she do it all I asked?

  • She has an assistant
  • Her nurse does it
  • One word: Nanny(ies).
  • She has no friends. And a husband who cheats on her. See, it all evens out in the end!
  • Meds. Very good meds. Maybe she can get us some

and my favorite response:
  • Magic.

I stopped comparing myself to the Pioneer Wimmin's of the blogging world. I will never be "that" blogger. I will never have a cookbook deal or a TV show or appear on daytime television. I know that. I'm ok with that, but I just have to say that her blog made me feel like an under-achiever. I'm sure some of you will know who I'm talking about. There can't be a whole lotta food blogs written by doctors can they? At least I don't think so. I may be totally in the dark here.

I don't have a personalized logo, or a recipe index. I don't have a "press" tab or have any of my recipes in categories. I just don't have the time to do any of that.

This really through me for a loop. Made me question this little blog of mine, this tiny piece of the Internet that some folks visit. Made me hate my not so perfectly lit photos taken in the garage before 4pm  because after that it gets too dark to photograph anything.  Made me feel bad about forcing my family to eat early every weekend or I won't get to photograph the food and then there goes another post down the drain.

It dredged up every bit of self doubt I had. I try so hard not to let it get to me, but it did. It had me questioning whether or not I should even continue this blog. It really had. Who would have thought a search for a birthday cake recipe for my Mom would have done this?

I just have to keep telling myself that I can't do it all. I thought I resigned myself to that fact. I don't know why that blog got to me the way it did. I'm thankful for every person that reads these words and makes my recipes and shares part of their world with me. I really am. I just have to let it go and not compare and just be me, but sometimes that is easier said than done.

And oh by the way.........I made a cake from a recipe on her blog and the cake sucked. The frosting was awesome but the cake was very disappointing. Maybe that was the universe saying "hang in there"?

Okay, enough with that......let's talk about dip shall we.

Here is a not so perfect picture that I'm sure foodgawker would reject immediately!


Hot Sweet Onion Dip


I have served this dip three times since Christmas. It was a huge hit every time.

It's very light, almost ricotta like. I tweaked it just a wee little bit.

If you are hosting a Super Bowl party, I can guarantee that this will be the first thing they eat.


Hot Sweet Onion Dip
adapted from a recipe at White on Rice Couple
8 oz package of cream cheese (very softened)
1 cup mayo
1 cup freshly grated Parmesan cheese
1 cup finely diced sweet onion.
1 tablespoon parsley
1 teaspoon garlic powder
1 tablespoon fresh cracked black pepper

Pre-heat oven to 350 degrees. Place the softened cream cheese in a large bowl and beat with a hand mixer (about 1 minute). Add the remaining ingredients and mix by hand until combined.

Place in an oven safe dish. Bake 30-45 minutes for all ingredients to cook together. You want the top to be nicely browned. Serve with your favorite bread, crackers or chips.

Tuesday, January 22, 2013

Mushroom Barley Bake

Barley Mushroom Bake 2

We had a beautiful snowfall last night and now we are getting for some really cold weather. I'm talkin' a high of  20 and night time lows of 4! Brrrrr! Factor in a wind-chill and you've got some pretty bone chillin' temps.

Just like the snow, I don't mind the cold. I love my thick old hat and my comfy mittens and I have a collection of about 12 scarves to pick from, so I say "bring it on". I get to go in my sock drawer and pick out the thickest pair I own. I might even throw a pair of long john (the pretty lady kind) on underneath my pants!

When this kind of cold hits, we even have to give up outdoor grilling. Sad, I know. There have been plently of times that we dig the Weber out of the snow and grill, but when temps get's this low, John can't regulate the heat, so outside grilling season is officially over.

I started to search for an indoor grilling pan. I did my research, asked friends which one they had and if they loved it. I'm lucky enough to have a sweet friend offer to send me hers! She hadn't been using it, so she offered it to me! How lucky am I? It came in the mail last weekend. I can't wait to try it. This means I can get my grill on again! Thank you so much Jan. You are such a sweetheart.

Cold weather means comfort food in this house. Hooray!

We are all about the soups and stews and baked casseroles. There is something so satisfying about taking a big old dish piping hot from the oven. Warm bread with butter. Hearty chowders. Hot Oatmeal and delicious breakfast bakes. We love winter foods!

This is a perfect wintery dish. You could serve it as a side or as a main course. It's so good and so easy!

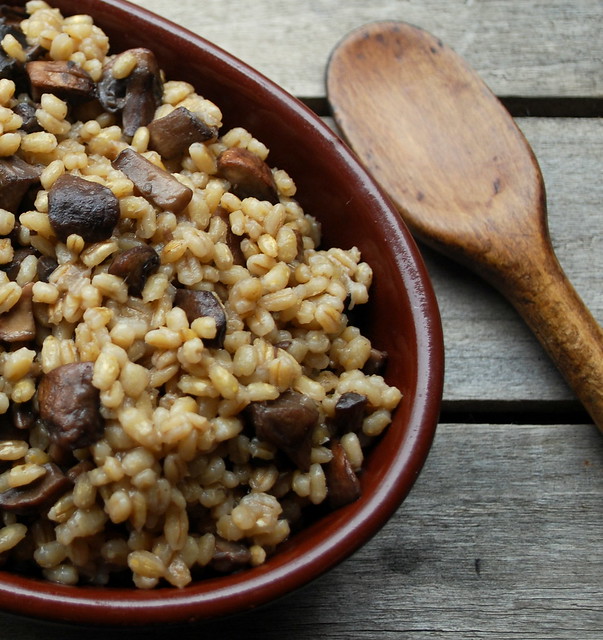
Just cook up a little onion and sautee some mushroom, throw some barley in a pan, add some broth, bake and done!

Barley Mushroom Bake 1


Mushroom Barley Bake
Recipe from Mennonite Girls Can Cook
Olive Oil – for cooking
1 small onion, chopped
3 cups of chopped mushrooms
1 cup or pearl barley (not pot barley!)
2 ¼ cups chicken, beef or vegetable broth

Cook the chopped onion in a bit of vegetable oil until almost tender. Add in the chopped mushrooms and cook until tender. Add the barley in. Stir to combine. Pour in the broth and transfer to a lightly greased 5 cup casserole dish.

Bake at 350 for 1 to 1 ¼ hours or until liquid has absorbed and barley is done.

I stirred mine up about half way through. The barley tends to rise up a bit.

Thursday, January 17, 2013

Seasoned Oyster Crackers

Seasonsed Oyster Crackers 4

I love it when it snows.

It snowed Wednesday, a little mid-week blast to cover everything in white. Yeah!

I love the quiet that comes with winter snow.

I love being nestled in the house, the snow acting as a buffer from all the outside noise. You don't hear people talking or too many dogs barking (at least not around there, it's just too cold to be outside!)

The most common noise in our ears is the muffled crunch of tires under the snow, or the occasional cracking of the ice underfoot as someone nears the back door.

My favorite place to be in the winter is snuggled under my cozy blanket with a cuppa tea in hand. Give me a book or magazine and I'm a happy girl, or better yet, give me a British television series and I'm in heaven. (Over my winter vacation I watch the entire 5 seasons of Doc Martin on Netflix! I couldn't get enough of it!) It doesn't hurt to have one of my Wood Wick candles crackling besides me either. Don't even get me started on Downton Abbey.

I know lots of folks hate the winter, hate the snow, hate everything about the aching cold of New England, but I love it. I embrace it. It's just another passing season so I try to enjoy it as best as I can.

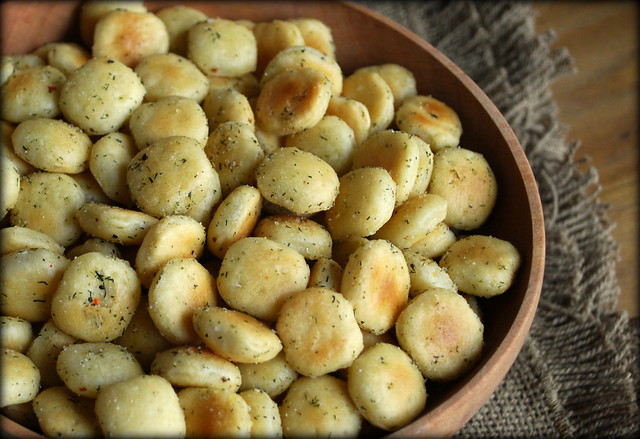
The house was loaded with cookies and candy over the Christmas holidays. I love sweets but even I got a sugar overload after New Years. We still love to nibble though and I can't think of a better snack than these Seasoned Oyster Crackers.

I've posted these before, way back when. I think they needed a revival cause they are so darn good.

These little crackers are one of my husbands most favorite things.

He loves them with a passion.  His Mom made them for him growing up and she passed the recipe on to me. I know there are lots of variations of this recipe out there, but this is the one we like best.

Just like Oreos or Potato Chips, they are addictive. You can't just eat one handful. Oh no, you can't.

You do need to prep these one day in advance to let the oil and seasonings soak into the crackers. We also have a little ritual that we do with the crackers. Every time someone walks by them, you have to give them a little tumble. Gently though. You just have to ok?

Oh one last things.....these are the perfect snack for football watchin'!

Seasonsed Oyster Crackers 1


Oyster Snack Crackers
recipe from Lisa@ The Cutting Edge of Ordinary
Two - 10 or 12 oz bags of Oyster Crackers (I usually find the 12oz bags, either will work)
1 cup vegetable oil
1 heaping teaspoon dill weed
1 teaspoon garlic powder
1/2 teaspoon lemon pepper
1 pkg Zesty Italian salad dressing mix (small 0.7oz envelope, usually sold in a 4 pack).

Mix all the ingredients together. I pour 1 cup of the oil in a 2 cup measuring cup then add all the spices. Use a fork or small whisk to combine. Place the crackers in an air tight container and pour oil mixture over the crackers. Stir well, but gently. You don't want to crush yer crackers. Let sit 1 day for best flavor. Gently tumble a few times a day.

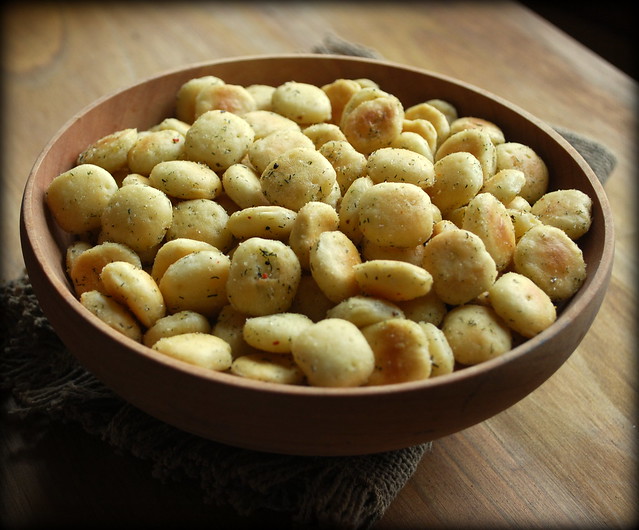
I know they look like an oily mess. Do not despair. The reason you need to let them sit for a day is so they can soak up all that oily herby goodness. It will work. Trust me.

Monday, January 14, 2013

Pasta Pie


Pasta Pie cooked post


All the Christmas decorations are back up in the attic. We took everything up last weekend. The house almost seems empty now. Empty in a good way. It's the time of year that makes me want to clean, clean, clean and organize everything. Must be a new year's thing.

I'm also on the lookout for some new/old furniture. I say new/old cause I'm hoping to find something unique piece at an estate or consignment store that I can re-purpose and re-finish if necessary.

I need a desk and I'm also looking for the new piece to hold hold everything that I have in my old hutch in. I was never into hutches. Mine is from my grandmother so it holds some sentimental value, but it just not working for me. Lots of wasted space.

I've got so many new recipes that I want to try I can barely choose which one I want to make next. I did get a jump start on my list when I saw this Pasta Pie.

I don't sit in front of the computer screen and say Oh. My. God. very often. It takes a special recipe to make me do that, but when I saw this pasta pie that's just what I said.

I found this recipe on a blog I really love...The Italian Dish. There are some really great Italian recipes to be found. This one just blew me away.

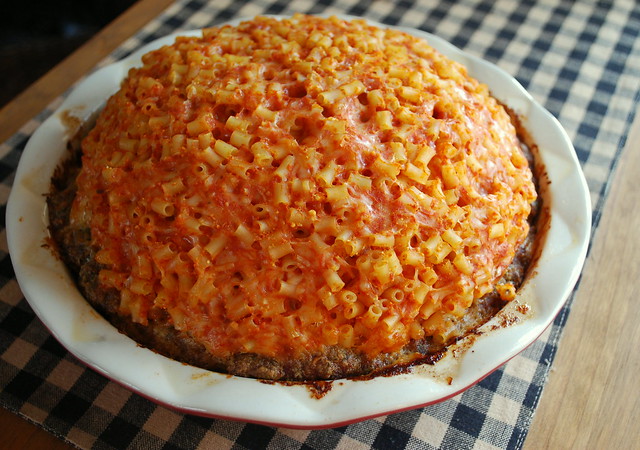
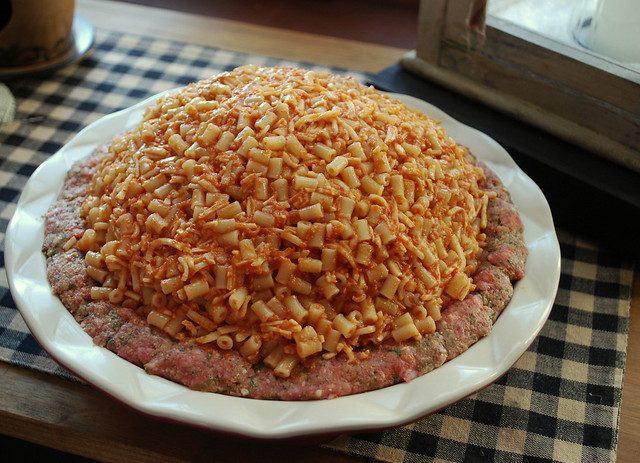
A meatball crust piled high with pasta, Parmesan and mozzarella. Gettaoutthere.

I decreased the breadcrumbs a bit. The original recipe called for fresh breadcrumbs. Not wanting to drag out the food processor, I opted for Italian seasoned ones. I also omitted the onion the original called for and used garlic instead.

Put this in a foil lined sheet before baking! I didn't and it dripped all over my oven!

Here is what the crust looks like before it's baked.

Pasta Pie post uncooked

And then with the filling.

Pasta Pie filled post

Note for next time. I wouldn't put quite as much pasta in the pan. It was really just a bit too much. The pasta to crust ratio was off for me. I'd also decrease the amount of cheese in the meat to about 3/4 of cup. If you have a favorite meatball recipe, use that. That's what I'll be doing next time.

Yeah the picture is a little blurry. I had hungry men yelling at me to hurry up and take a picture so they could eat!

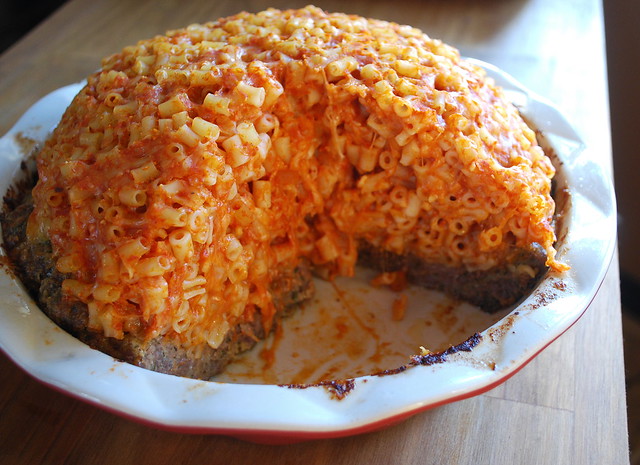
My cousin Eric told me that this dish looked like brains. It kinda does. Tasty, tasty brains.

pasta pie cut


Pasta Pie
adapted from a recipe at The Italian Dish
3/4 cup Italian seasoned bread crumbs
¼ cup finely chopped parsley
2 cloves garlic, finely chopped
1¼ cup freshly grated Parmigiano Reggiano cheese, divided
½ teaspoon sea salt
¼ teaspoon pepper
3 eggs, slightly beaten
1½ pound (24 ounces) ground beef
14 ounces ditalini (or other small pasta), about 5 cups cooked
1 pound (16 ounces) shredded mozzarella cheese
3 cups marania sauce divided

Spray a deep dish pie pan with cooking spray. Preheat oven to 350 degrees F.

In a large bowl, mix the bread crumbs, parsley, garlic, ½ cup Parmigiano cheese, salt and pepper together until well blended. Add the eggs and ground beef and toss gently until ingredients are blended. Do not over mix. Form a crust about an inch thick with the meat mixture in the pie plate. Set aside.

Meanwhile, cook the ditalini pasta until just al dente. Do not overcook - the pasta needs to be slightly underdone because it will cook further in the oven. Drain the pasta.

In another large bowl, mix the cooked pasta with ¾ cup of the grated Parmigiano cheese, the mozzarella cheese and 2 cups of the marinara sauce. Mix well and then pour into the meat crust, forming a high dome with the pasta. Cover with nonstick foil. Place on a foil lined sheet to prevent drips!

Bake at 350 for 1½ hours, removing the foil the last 15 minutes to get the top a little crusty. Remove from oven and let cool 15 minutes before serving.

Slice into wedges and serve with the additional marinara sauce.

Tuesday, January 8, 2013

Teppanyaki Style Ginger Dressing

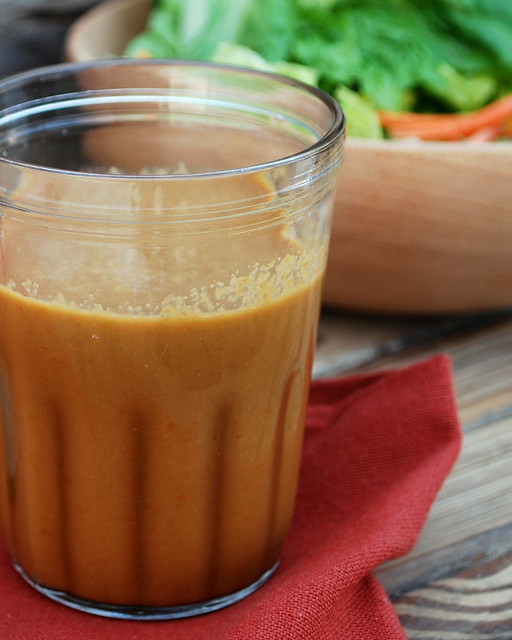
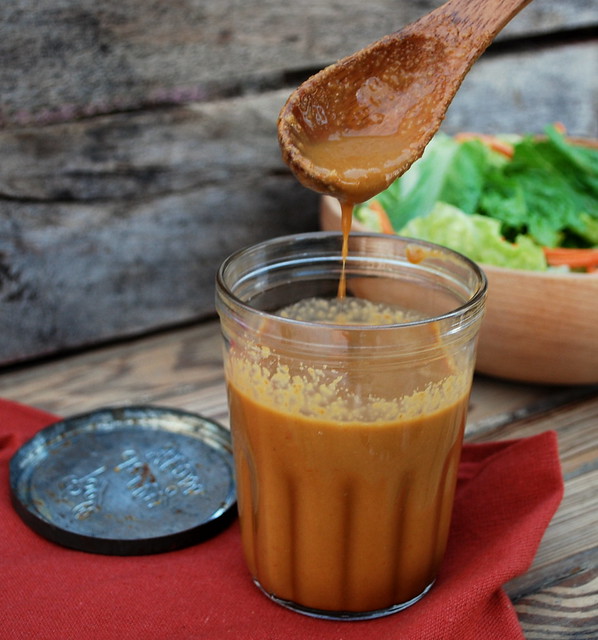
Ginger Dressing. 2jpg


Don't feel bad if you looked at the word Teppanyaki and thought "what the heck is that?". 

I did the same thing. 

Teppanyaki = is a style of Japanese cuisine that uses a big iron gtill to cook food. The word teppanyaki is serived from teppan, which means iron plate and yaki, which means grilled or pan fried.  

Let me put it to you another way. Hibachi Style Japanese Steakhouse.

You've probably been to one....big gas grated flat grill integrated into table around which many people can sit and eat at once. The chef performs the cooking in front of the dinners, typically with theatrical flair, such as lighting a volcano shaped stack of onions on fire or flipping an egg into the air and catching it in their chef's hat.

It was all the rage back in the 90's and I have to admit, we had a local Japanese Steakhouse here in Rhode Island and we went every time it was my birthday and one of the reasons why was because I was addicted to the ginger dressing. 

Addicted I tell you.

My friend Eva and I would always ask for double the amount of dressing and then pour it over our rice, dunk our shrimp into and yes, we used it on the salad too. Salad at the steakhouse wasn't anything to get excited over, mainly lettuce and a few shreds of carrots, but that dressing, it made everything better.

I served this on New Year's Eve and everyone was raving about it. 

I was so excited when I found this recipe on Nibble Me This, and even more excited when I learned that everything just goes into the blender for a big spin. 

I'm a ginger lover so I added in an extra tablespoon. 

Ginger Dressing


Ginger Dressing (Teppanyaki Style)
3/4 cup onion, diced
1/4 cup carrots, diced
1 tablespoon fresh ginger (or more if you love ginger like I do)
2 teaspoons lemon juice
2 teaspoons ketchup
1/2 cup soy sauce
1/2 cup rice wine vinegar
1/2 cup vegetable or canola oil

Place all the ingredients in a blender except the oil and liquify until it's a smooth consistency. Add the oil in slowly while blending.

I poured mine into a mason jar so I could just shake it up and serve it. 

Thursday, January 3, 2013

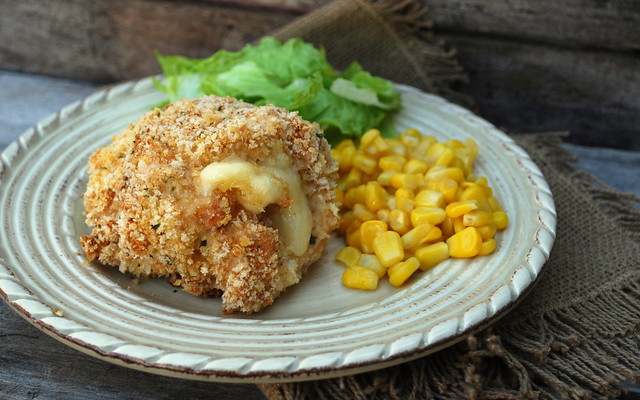
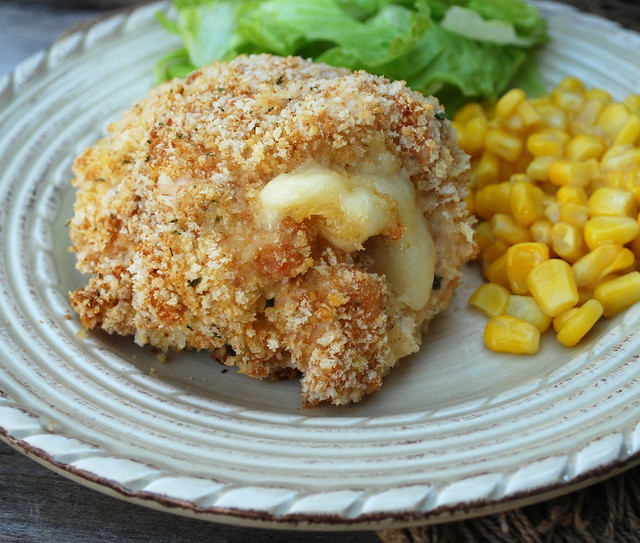
Easy Chicken Cordon Bleu

Chicken Cordon Bleu

So 2013 is here and with it a flood of posts about new years resolutions.

You won't see any here. I don't make them. I think you're just setting yourself up for disappointment most times. I don't need a date on the calender to change the way I think or eat or live.

I don't see anything wrong with setting your mind to do something and getting it done, so if that is what some people call a resolution then I guess I do make them, I just don't wait until January 1st to do it.

2012 has been a tough year for us. The loss of our beloved Moose is still effecting us. It's been nearly a month and we still miss him dearly. There is this emptiness in the house that is so tangible it's almost like an ache to me.  At least once a day something will move me to tears and John will take my hand or give me a hug and say "I know Mama". His absence is felt every single day. Life goes on as they say, but it's still really hard without Moose here. Keeping busy always helps. This winter will be filled with garden plans and new woodworking projects. We have stored up lots of things on our to-do list, so our heads are swimming with new projects for the house and yard that we hope to conquer over this year.

There will be many new recipes to try and share with you all. I always look forward to making something new and delicious to bring to you. I have a fantastic new salad dressing that I made for New Year's Eve. You are going to love it. I also found a really interesting pasta pie that I'm going to make this weekend, so there will experiments commencing in the kitchen once again.

I'm happy to say 2012 is over. Good riddance to you. 13 was always a lucky number for me, so bring it on new year.

Now on to the Cordon Bleu.

This is my very simple recipe. Don't be intimidated by Cordon Bleu, it's just cheese and ham stuffed in a chicken breast. I promise it's easy.

Chicken Cordon Bleu 1

Easy Chicken Cordon Bleu
recipe from Lisa @The Cutting Edge of Ordinary
4 chicken breasts
4 slices of thick sliced Swiss cheese
4 slices of thick sliced black forest ham
2 eggs, beaten
seasoned breadcrumbs (I use a combination of Italian and Panko)
toothpicks

The first thing you need to do is flatten out your chicken breasts. Lay one down on a cutting board and with a sharp knife fillet the breast out a bit. I slice into the thickest part of the breast and thin it out. Next place a piece of parchment or waxed paper over the chicken breast and flatten it out by pounding it with a wooden mallet, or whatever you have that will work. A heavy cast iron pan will work in a pinch.

Once the breast are thinned out, lay a slice of cheese and a piece of ham down the middle of each one. If your Swiss cheese slice is a bit long, just cut it in half and use both pieces. Roll it up and secure with a toothpick or too.

Roll each chicken breast in the beaten egg and then into the breadcrumbs. I like to use a combination of Italian crumbs and panko. Refrigerate for at least a half hour. This helps them to hold together a bit better. Place on parchment lined baking sheet and cook for 30 - 35 minutes on 350 or until golden brown. Let it rest for 5 minutes or so. This is stop the cheese from oozing out as soon as you cut into it. Remember to take out the toothpicks (or warn your guests) before eating!