Friday, November 22, 2013
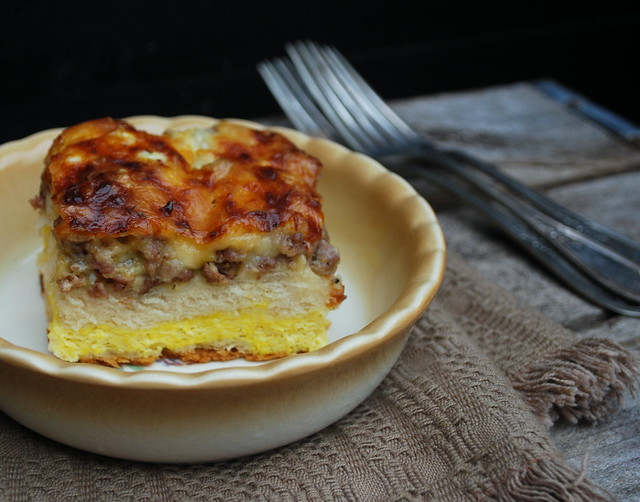
Biscuit, Sausage & Egg Casserole
So Thanksgiving is fast approaching. It's one of my favorite holidays. What's not to love about a day that's all about the food?
I'm not crazy about turkey. It's ok. Making a turkey once a year is perfectly fine with me cause I'm all about the sides anyway. I was a vegetarian for over 20 years and I remember people always feeling bad for me when Thanksgiving rolled around, but I was always one happy girl cause there were so many other delicious things to eat besides the bird.
On Thanksgiving morning I'm up bright and early and I head straight to the kitchen to get started so my clan usually fends for themselves when it comes to breakfast, but I found a Biscuit, Sausage and Egg Casserole that is so easy and quick to put together that I think I can make this before my oven fills up for the day.
I changed a few thing from the original recipe that I found on At Home with Lady B. I read the reviews and many folks were complaining that the eggs were not fully cooked and that the biscuit layer was too thick I pulled this out of the oven at the suggested 30 minute mark and my eggs were still runny so I popped it back for more cooking time. I adjusted the ingedient amounts and time and it came out great.
This recipe does a bit of flip-flopping in the oven. The eggs sink to the bottom and the biscuits rise up to the middle. Pretty cool!
I think my husband ate half the pan! It's a keeper!
Biscuit, Sausage & Egg Casserole
Adapted from a recipe At Home with Lady B
5 ½ buttermilk biscuits (from an 8 count tube)
1 pound of any breakfast sausage (browned, drained, and cooled)
1 cup shredded mozzarella cheese
1 cup of shredded cheddar cheese
6 eggs, beaten
3/4 cup milk
½ teaspoon Italian seasoning
Salt & pepper to taste
Preheat oven to 425 °F. Crumble and cook sausage in a skillet over medium heat until browned. Drain.
Line bottom of an 8 x 8 inch baking dish with biscuit dough, firmly pressing perforations to seal. I put four biscuits in the bottom of the pan, flatten them out and then filled in the empty spaces using pieces of the remaining biscuit and a half. Sprinkle with sausage and then cheese. Whisk together eggs, milk, Italian seasoning, salt and pepper in a medium bowl until blended; pour over sausage and cheese.
Cover with foil and bake 20 minutes. Remove foil and bake an additional 20 – 25 minutes or until a knife inserted in the center comes out clean. Let stand for 5 minutes before cutting into squares; serve warm.
Monday, November 18, 2013
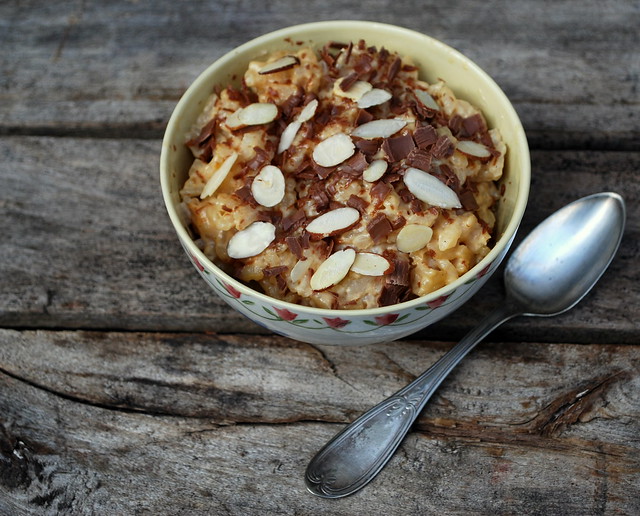
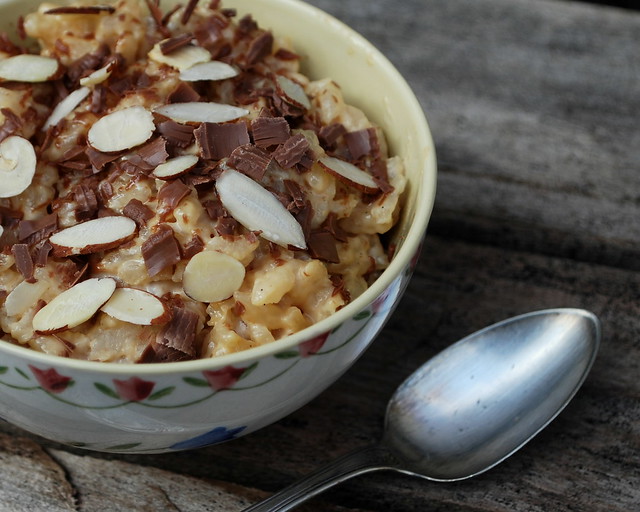
Almond Joy Rice Pudding
I'm feeling all cozy and homey right now. I love that hunkered down, cuddled up feeling that this time of year brings. I love wrapping myself up in a blanket and pulling up my thick knee socks. I love digging into the stash of books I've been collecting all summer and fall. I love that it's pie season. Had to throw that in, cause well...PIE!
My list making is going into overdrive. I've got my thanksgiving recipe lists (and folder), I've got Christmas present lists, I've got craft supply lists and the most important of all, I've got my "must make list". It's a little collection of recipes that I kind of pull from a bigger collection of recipes and move to the top. Priorities you know?
My friend Rebecca from Foodie with Family posted this recipe on her Facebook page last week. It was one of those moments where the clouds parted in the sun shined down and my heart screamed hallelujah! I am crazy mad for rice pudding. I also love coconut...and oh yeah, chocolate. I'm a bit crazy for that too. This recipe combined all three. Heaven. I ate this right out of the pot. I'm not ashamed to tell you that. I eat it cold too, but I couldn't wait to eat it. It was lunch for me last Saturday. Lunch never tasted so good.
Don't worry that the coconut water will make this too coconutty, it won't. This made enough for my friend Tati and I to eat. She is a rice pudding lover too. If you love it as much as we do, you may want to double the recipe!
Rebecca has a great recipe for Whipped Coconut Cream. Check out the link for that recipe.
Almond Joy Rice Pudding
recipe from Rebecca - Foodie with Family.
1 can coconut milk (unsweetened)
1 can evaporated milk
Whole milk or half and half
1/2 cup arborio rice
¼ cup raw sugar
vanilla bean, split and scraped
a pinch of salt
shaved or chopped dark chocolate
Optional Toppings:
Whipped coconut cream (see recipe below)
Toasted coconut
Toasted sliced almonds
Pour the coconut milk and evaporated milk into a four cup measure. Add enough whole milk or half and half to measure 4 cups evenly.
Stir together the milk mixture, rice, raw sugar, vanilla bean (both the bean halves and the scrapings), and salt to a medium sized, heavy-bottomed saucepan over medium high heat.
Bring the mixture to a boil, stirring frequently, then lower the heat to medium low and allow it to simmer for 45-60 minutes, or until the rice is tender and the liquid is thickened. It will continue to thicken as it cools.
Let it cool several minutes, covered, before transferring to serving dishes.
To Serve Warm
Top the warm pudding with shaved or chopped dark chocolate, whipped coconut cream, and toasted coconut for Mounds bar pudding or add almonds with everything else for Almond Joy pudding.
To Serve Cold:
Cover the portioned pudding with plastic wrap directly on the surface of the pudding. Chill for at least an hour (but up to 3 days in advance) before serving. Top the chilled pudding with shaved dark chocolate, whipped coconut cream, and toasted coconut for Mounds bar pudding or add almonds with everything else for Almond Joy pudding.
Tuesday, November 12, 2013
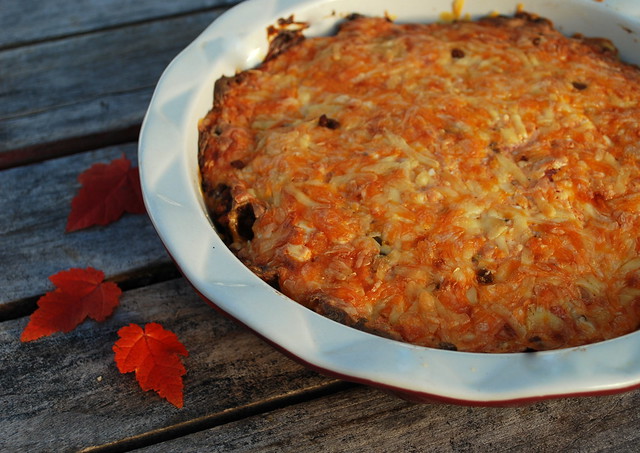
Dorito Taco Pie
Every fall and winter I have this dilemma. I can't photograph food 5 days out of the week.
Why? Well, I work full time and by the time I get home, it's dark outside.
I take all my photos in natural light, so when the suns goes down, nothing gets photographed. I don't have Photoshop, so what you see is what you get with me.
It does limit me to weekends to take a decent photos, and sometimes even then the weather doesn't cooperate here in New England.
That still won't stop me from sharing delicious recipes with you. I think you all can see past the not so stellar photo and know that when I tell you something is delicious and you should make it, it is.
This Dorito Taco Pie was delicious. The bottom is layered with crushed Doritos. Yes, Doritos. Trust me on this, and I know for some of you this is such a non-issue cause you already told me how much you love Doritos.
I made two of these because we had friends over to watch football. I served it with shredded lettuce, sour cream and guacamole. It was such a hit.
Dorito Taco Pie
recipe from my mother-in-law Carol!
1 pound of ground beef
1 pkg taco seasoning
2 cups Dorito Nacho Cheese chips, crushed
8 ounces of cream cheese, room temp
½ cup salsa
2 cups shredded cheddar cheese, divided
2 cups shredded lettuce
2 tomatoes, diced
Grease a 9x13 inch baking dish, or a deep dish pie pan. Place the crushed Doritos in the bottom of the pan. Cook the ground beef, breaking it up as it cooks. Drain any grease. Add in the package of taco season and cook as directed on the package. Spoon the ground beef over the crushed Doritos.
In a medium size bowl beat the cream cheese until smooth and then slowly add in the salsa. Pour this over the ground beef. Top with 1 ½ cups of cheese. Top the cheese with shredded lettuce and tomatoes. I skipped this step because we are not fond of hot lettuce and we don’t like tomatoes, but if you are go ahead and pile it on then add the remaining cheese. If you’re like us, add the lettuce and tomatoes after and just use the full two cups of cheese to top it.
Bake at 350 for 25-30 minutes or until cheese it brown and bubbly. Serve with sour cream, guacamole, etc.
Friday, November 1, 2013
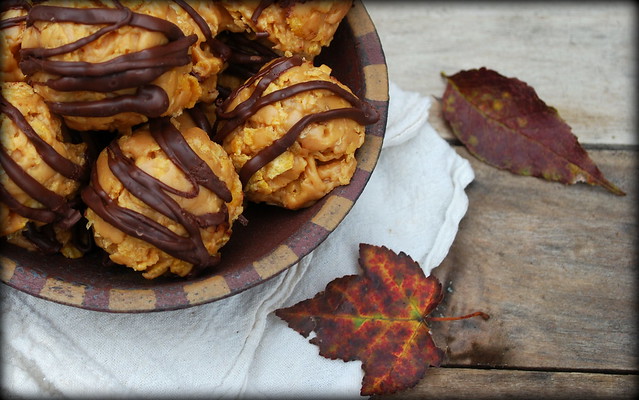
Peanut Butter Corn Flake Treats (No Bake!)
Hello November!
While October is usually my most favorite month of the year, this October proved to be a bumpy ride. While we thoroughly enjoyed our Ohio vacation, my heart was being pulled home. My Dad had a few cardiac episodes which involved two procedures, one very scary one in Boston which had us all on edge. He has pulled through and is even back to walking (for a few months with Mom by his side). I'm ever so grateful that he's doing well.
My youngest turned 17. Yikes, my YOUNGEST! When did I get this old? We had a big party for him last weekend. I'm still recovering from the marathon cooking session.
I found this recipe called Holycraptheseareamazing Cookies. I can't remember where I saw this recipe. I looked it up online and there are lots of bloggers who made these, so my apologies if you are the original creator! (Contact me and I'll link back to your blog!)
To be honest this one was in my recipe file for awhile. When you see a title like that you just have to make them right? The ingredient list was pretty simple too and they were no bake, a no brainer. I re-named this recipe Peanut Butter Corn Flake Treat cause they just weren't amazing to me. They were good, don't get me wrong, but I'm not a peanut butter freak, so they weren't fantastic or amazing in my book but my kids loved them, but what kid doesn't like a rice krispie type treat? This would be a great recipe to make with youngester/toddlers.
Peanut Butter Corn Flake Treats
1 cup sugar
1 cup corn syrup
1 jar (18 oz) peanut butter
6 cups corn flakes
3 oz good chocolate
Combine the sugar and the corn syrup in a medium saucepan. Place over medium high heat and stir until the mixture comes to a full boil. Remove from heat and stir in whole jar of peanut butter. Mix well.
Add the cornflakes to a large bowl and pour peanut butter mixture over the corn flakes and mix well talking care to coat all the corn flakes.
With a tablespoon of cookie scoop out and form into 1 – 2 inch balls depending on your preference, and place them on a cookie sheet lined to parchment or wax paper.
Put the chocolate in a small bowl and melt in the microwave for 30 seconds. Stir until smooth. Drizzle over cookies.
Subscribe to:
Posts (Atom)