Friday, July 31, 2009

Blueberry Coffee Cake

Blueberry Coffee Cake

You knew they were coming….blueberry recipes.
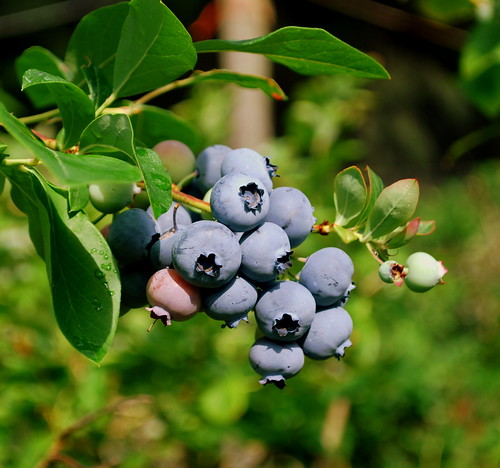
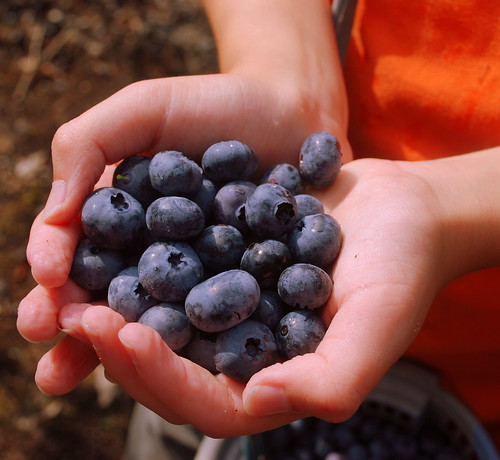
I was on a blueberry bake-a-thon after our huge harvest.
I spent last Saturday night doing a food blog search for blueberry recipes.

I love the Food Blog Search Engine. If you're looking to cook or bake with a specific ingredient, just pop it in the search engine and it will scour through thousands of food blogs for you. I like using it much more than a regular ole search engine cause most of the time I can see photos and read a bit more about the recipe. So that’s my plug for the Food Blog Search Engine. On to coffee cake….

I found this recipe on a blog called Family, Friends and Food. The source was listed as Aunt Sylvia and Mom K. I find that when a recipe’s source is anything like Aunt Beatrice, or Granny Thurman, etc. the recipes are usually tried and true, made for decades in a family kitchen and happily consumed by family and friends. After I made this recipe and family and friends happily consumed it, I knew I had found another one to add to my collection.

Blueberry Coffee Cake on tray2

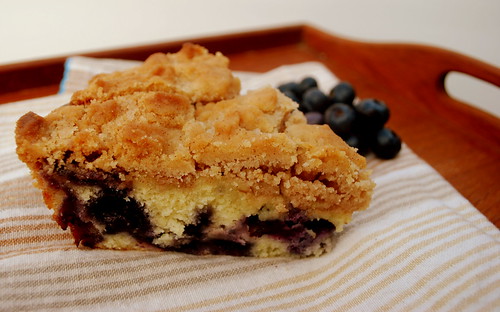
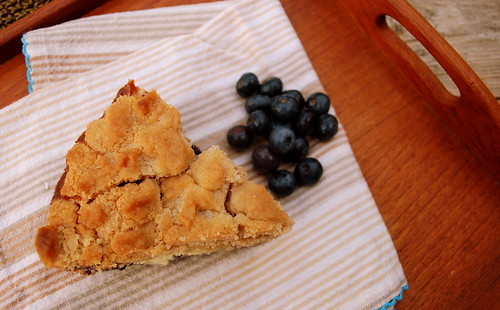
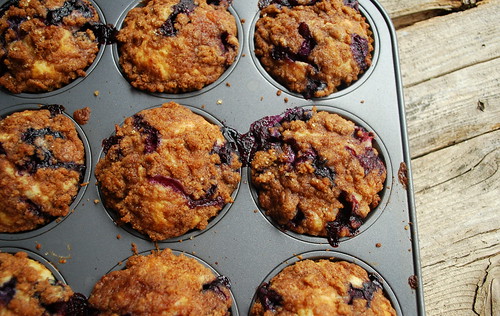
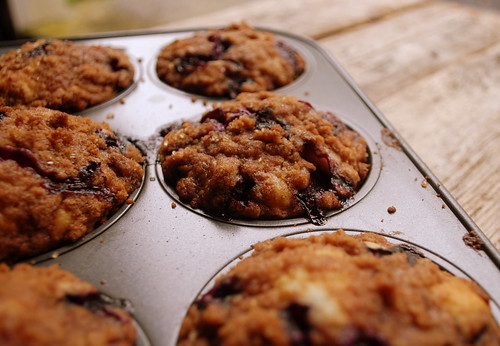
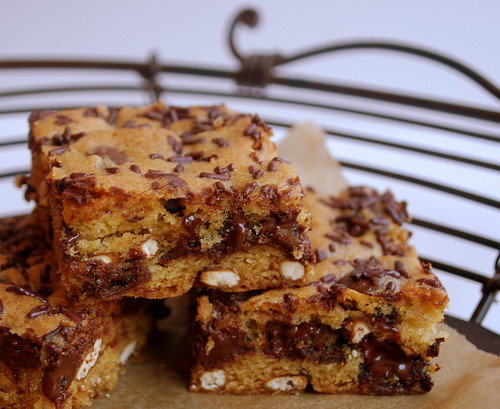
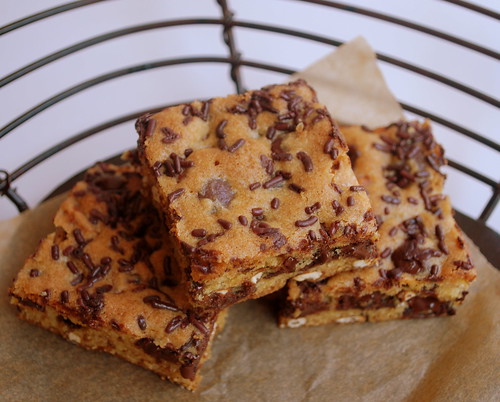
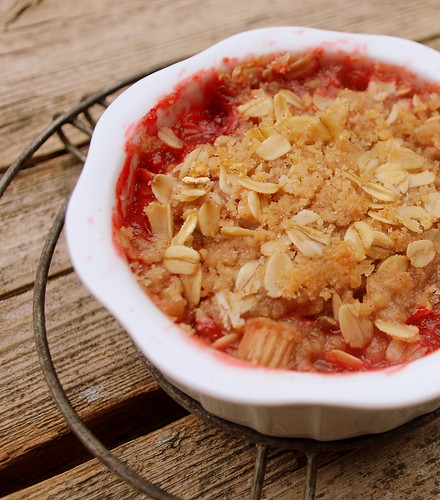
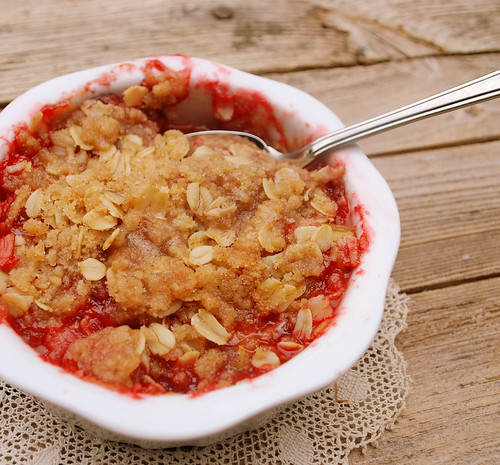
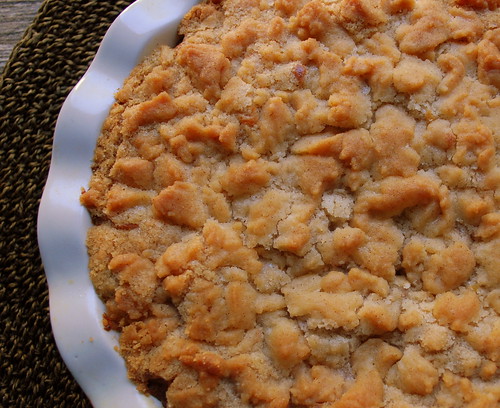
This coffee cake is like a giant big blueberry muffin with a half-inch of delicious crumbly topping. I cut it in big pie like wedges and packed some in John’s lunch for a mid-morning snack. The rest I brought into work where it was gone in about 1.4 seconds. Seagulls….gotta love ‘em.

Blueberry Coffee Cake
Recipe from Family, Food & Friends
Source: Aunt Sylvia & Mom K
Printable recipe
¼ cup butter, room temperature
¾ cup granulated sugar
1 egg
½ cup milk
1 ½ cups all-purpose flour
2 teaspoons baking powder
½ teaspoon salt
2 cups blueberries (if frozen, do not defrost)

Preheat the oven to 375. Cream together the butter and sugar. Add the egg, milk, flour, baking powder and salt and mix until just combined. Batter will be thick. Gently fold in the blueberries. Spread into a 9-inch pie pan.

Topping

½ cup butter, room temperature
1 cup granulated sugar
2/3 cup all purpose flour
1 teaspoon cinnamon

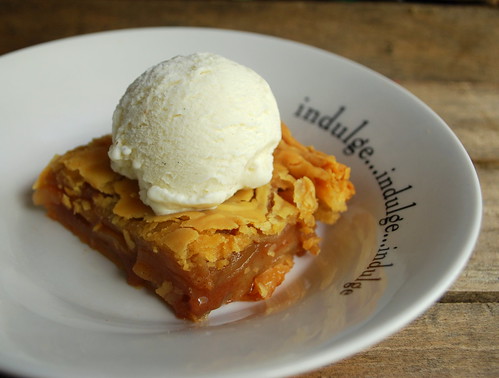
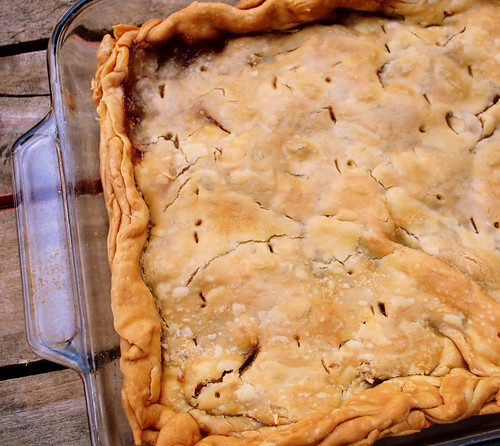
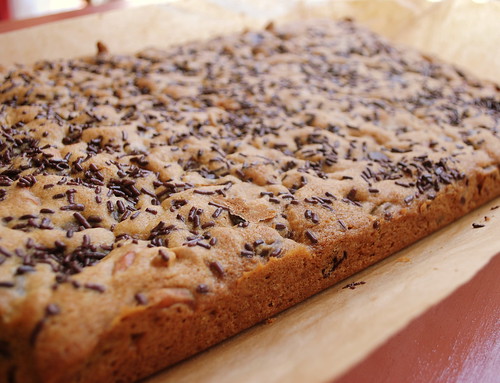
Cream together the butter and the sugar. Add in the flour and cinnamon and mix until crumbly. Sprinkle over the batter. There’s a lot of topping. It might look like there’s actually too much topping for the cake, but there isn’t. That topping bakes into a golden crunchy topping that’s perfect with the moist blueberry center, so pile it on. Bake for 25 to 30 minutes, or until lightly browned. Sprinkle with powdered sugar after it has cooled a bit.
Serve warm or room temp.

Blueberry Coffee Cake on tray TS

Wednesday, July 29, 2009

Blueberry Pickin'

Macombers Blueberry Stand Trio

Saturday morning we ventured out to Rice City in the Western part of Rhode Island to pick us a boatload of blueberries.

We've been picking blueberries here for the last 10 years.

Macombers Blueberry Stand

Macombers Blueberry Stand birdhouse

This farm is nestled into the woods down a long dirt road.

Just where a blueberry farm should be.

Macombers Blueberry Stand pickers

Macombers Blueberry Stand bloom

It doesn't hurt that the surroundings are beautiful and the berries are plentiful.

Macombers Blueberry Stand berry bunch

We picked and picked and sampled, then picked some more and sampled a bit more too.

Macombers Blueberry Stand collage

It had rained the night before, so the bushes were full of raindrops.

We all left with "granny fingers" as the kids call them.

They were all wrinkly and prunish, but we kept on pickin'.

Macombers Blueberry Stand handful

We ended up picking 16 pounds of blueberries. Yup, 16 pounds.
In case you're wondering what 16 pounds of berries looks like, let me show you.

They fill up a really big bucket.

Macombers Blueberry Stand bucketful

Now what do you do with 16 pounds of blueberries you ask?

Well first you spend oh....6 to 8 hours prepping them for the freezer so we can have muffins and pancakes and pies and other blueberry treats well into the winter.

With the 3 or 4 pounds you didn't freeze, well you use those to bake with.

You make the best blueberry muffin on earth. Which I did.

To Die for Blueberry Muffins

They are called To Die for Blueberry Muffins, and they really are. Everyone who puts one in their mouths declares them "the best blueberry muffin ever". Trust me, they are. I think it might have something to do with the irresistible crunchy topping.

To Die for Blueberry Muffins CU

I blogged about them awhile back, but since then I've tweaked the recipe just a tad and now it's absolutely perfect.

One of the nice things about these muffins is, you don’t need an electric mixer. Two bowls, a measuring cups and a few measuring spoons is all it takes to make these scrumptious muffins.

To Die for Blueberry Muffins
Printable recipe
1 ½ cups all-purpose flour
3/4 cup granulated sugar
1/2 teaspoon salt
2 teaspoons baking powder
1/3 cup canola oil (or vegetable oil)
1 egg
1 teaspoon vanilla
enough milk to fill one cup
1 cup fresh or frozen blueberries

Topping

1/2 cup brown sugar
1/3 cup all purpose flour
1/4 cup butter, cold and cubed
1 1/2 teaspoons cinnamon

Preheat the oven to 400. Grease the muffin cups or use muffin liners. This recipe made 11 muffins for me.

Combine the flour, sugar, salt and baking powder in a large bowl. Whisk to mix. Place the vegetable oil into a 1-cup measuring cup and add the egg and vanilla. Pour in enough milk to fill it to the 1-cup line. Pour this into the flour mixture and mix just until combined. Don’t over mix! Gently fold in the blueberries. The batter will be thick.

Fill the muffin cups to the top. I used an ice cream scoop and one scoop filled them perfectly.

To make crumb topping:

Mix together the brown sugar, flour, cubed butter and cinnamon. Using a pasty blender or a fork combine until the butter is pea sized. Sprinkle over the muffins before baking. I used a heaping tablespoon for each one. Trust me, heaping mounds of topping are a good thing.

Bake 20 - 25 minutes in a preheated oven or until they test done. Let cool 5 minutes in pan, and then remove from pan to cool on a rack. Eat warm if possible!

To Die for Blueberry Muffins in basket

Sunday, July 26, 2009

First Lady Michelle Obama's Apple Cobbler

Michelle Obamas Apple Cobbler slice CU1

I don’t remember how I found this recipe, but somehow I stumbled upon the site called Obama Foodorama. I poked around the site for a bit and came across an article on White House Recipes and found this recipe from the First Lady herself.

Seems this is one of the Presidents favorite desserts. The fact that this recipe calls for 3 refrigerated piecrusts makes me love the First Lady even more. I am not a snob when it comes to piecrust. I can make a great piecrust, but the convenience of using that little red box saves me time, and that is a precious commodity to me.

Michelle Obama's Apple Cobbler

Here’s some info from the Foodorama on Mr.Obama’s cobbler submission for Yankee Magazine:

I've been making this cobbler for a long time, so I usually just eyeball how much needs to go in," Mrs. Obama told Yankee. "People might want more or less sugar, but this is how our family and friends like it...Bake at 300 for up to 3hours--that's what makes the crust flaky, like Barack likes it. This recipe makes one cobbler, which is like a double pie. "The President has repeatedly gone on the record about liking flaky crusts and cobblers; he now refers to White House Executive Pastry Chef Bill Yosses as "the crust master."
Let me just say this tasted terrific, but I would not call this a cobbler. This is one big apple pie, which would be great to serve at a party or cookout. It makes one big ole pan of pie. You could feed the masses. This is the first "cobbler" recipe I’ve seen with a 3-hour bake time. I guess this would be perfect to make in the fall and winter, since the house would smell like apple pie for 3 hours.

Michelle Obama's Apple Cobbler
recipe from Yankee Magazine
Printable recipe
Filling
8 Granny Smith apples, peeled and sliced
1-1/2 to 2 cups of brown sugar (I opted for 1 ½ cups)
1-1/2 teaspoons cinnamon
1 teaspoon ground nutmeg
1/2 teaspoon salt
1/4 cup white flour

Mix these ingredients together in a bowl and let it sit in the refrigerator overnight so the spice goes all the way through the apples.

Crust
3 sheets of refrigerated piecrust
1 stick of butter

Preheat oven to 325 degrees. Butter and flour the bottom of a large baking dish. I used a 9x13 stone baker. Roll out three piecrusts really thin--as thin as possible. Layer the bottom of the pan with 1-1/2 of the piecrusts and prick a few holes in it.

Pour the apples with the liquid into the pie pan. Dot 3/4 of a stick of butter around the apples. Use the final 1-1/2 piecrusts to cover the apple mixture entirely (let the pie crust overlap the pan). Pinch the edges of the dough around the sides of the pan so the mixture is completely covered.

Melt final 1/4 stick of butter and brush all over top of crust.

Michelle Obamas Apple Cobbler slice  CU

Reduce the oven temperature to 300 degrees. Bake at 300 for up to 3 hours -- that's what makes the crust flaky, like Barack likes it. Put the cobbler in the oven and go for a walk, go to the store, or do whatever you have to do around the house. Start looking at the cobbler after two and a half hours so it doesn't burn.

Saturday, July 25, 2009

Listening to.....

The hum of the fan.

The peeps of the birds.

The sound of his feet outside the window.

John

The snap of the beans.

green beans

The buzz of the bees.

bumble

The snoring dog on the floor.

Moose nappin'

The click of my camera.

Wednesday, July 22, 2009

Root Beer Float Cake

Root Beer Float Cake whole

My youngest is a root beer nut. We don’t allow the boys to drink much soda, but on the rare occasion that they can order it in a restaurant or have it at a party or as a special treat, Evan always chooses Root Beer or Dr. Pepper. He also loves root beer floats. Brown cows as we call them here. A few times a year I’ll pick up some good root beer, break out the tall sundae glasses and vanilla ice cream and make ourselves some root beer floats.

When I stumbled across this recipe for Root Beer Float cake I knew I just had to make it. I followed the recipe from New Frontiers in Baking for the cake, and the adapted recipe from Joy the Baker for the frosting. The cake was moist and chocolaty and had a deep, rich flavor with hints of root beer peeking through. The frosting was…well, how should I put this?? Strange. It almost had a bubbly taste. I wasn’t crazy about it. Next time I may skip the root beer frosting all together and just go for a milk chocolate frosting. It wasn’t bad….it just wasn’t as good as the cake. The kids gobbled it up nonetheless.

Root Beer Float Cake slice

Root Beer Float Cake
Printable recipe
Adapted from Baked: New Frontiers In Baking by Matt Lewis and Renato Poliafito
2 cups root beer (do not use diet)
1 cup dark unsweetened cocoa powder
½ cup unsalted butter, cut into ½ inch cubes
1 ¼ cups granulated sugar
½ cup firmly packed dark brown sugar
2 cups all purpose flour
1 ¼ teaspoons baking soda
1 teaspoon salt
2 large eggs

Preheat the oven to 325. Spray a 10-inch Bundt pan with nonstick cooking spray, or butter generously and dust with flour, knocking off the excess.

In a small saucepan, heat the root beer, cocoa powder and butter over medium heat until the butter is melted. Add the sugars and whisk until dissolved. Remove from heat and let cool.

In a large bowl whisk together the flour, baking soda and salt.

In a small bowl whisk the eggs until just beaten. Whisk in the cocoa mixture until combined. Gently fold the flour mixture into the cocoa mixture. The batter will be slightly lumpy. You can give it a quick whisk if you like, but don’t over beat the batter or it could cause the cake to be tough. Don’t worry if the batter is very loose.

Pour into Bundt pan and bake for 35 to 45 minutes, rotating the pan halfway through. Bake until a sharp knife inserted in the center comes out clean. Transfer to a wire rack to cool. Loosen edges with a butter knife and turn onto a cake plate.

Chocolate Root Beer Frosting

2 ounces dark chocolate (60% cacao), melted and cooled slightly
½ cup (1 stick) unsalted
butter, softened
1 teaspoon salt (not kosher)
¼ cup root beer
2/3 cup unsweetened cocoa powder
2 ½ cups powdered sugar

Put all the ingredients in a food processor. Pulse in short bursts until the frosting is shiny and smooth.
2. Use a spatula to spread the fudge frosting over the crown of the Bundt in a thick layer. Let the frosting set before serving, with the ice cream on the side.

Root Beer Float Cake TS

Saturday, July 18, 2009

Maui Onion Dip

Maui Onion Dip CU

We are a dippy family. Yeah those you that know us probably just nodded your head yes and agreed with that statement, but I’m not talking that kind of dippy, I’m talkin’ dip dip. We love dips. Be it artichoke or olive, dill, veggie or clam, (hey we are from New England after all) or even the Heluva Good dips my husband loves to keep the fridge stocked with, we love a good dippin’.

Onion dip is one of our favorites and up until now we enjoyed the occasional Lipton onion dip, but sadly, that can be no more.


I’m afraid I have to cast off the powdery dip in the pouch now that I have found this dip.

Maui Onion Dip Collage
This creamy, tantalizing onion dip that is like no other dip we have tasted.


Amazingly good.

The hardest part of making this was caramelizing the onions and that took like all of 20 minutes.

I made this over the weekend when we had 2 extra kids in the house (as always) and the gang of them just about polished the whole bowl off on us. I managed to salvage a few tablespoons for John and I. It wasn’t enough.

Must make more.

Honestly, if you love dip, make this. If you love onions make this. If you have a family that’s as dippy as ours, make this.


To check out more great recipes and indulge in everything Hawaiian
check out: 
Live Your Aloha

Let me just say that there are no Maui onions to be found here in New England, so I used 3 large sweet vidallias and they were perfect.

Caramelized Maui Onion DipSunset Magazine – June 2009Printable recipe

Make this at least an hour ahead of time to allow the flavors to develop.
2 tablespoons olive oil
2 Maui onions (or other sweet onions) halved and thinly sliced (about 5 cups)
1 cup sour cream
½ cup buttermilk
1 teaspoon kosher salt

Heat the oil in a large nonstick frying pan over medium heat. Add the onions and cook, stirring occasionally, until brown, sticky and caramelized (about 20 minutes). If the pan starts to burn, reduce the heat to medium-low and add 1 tablespoon of water, stirring well. Transfer the onions to a small bowl and chill until cold (about 1 hour).

Reserve 1 tablespoon of the onions.

In a food processor, pulse the remaining onions, sour cream, buttermilk and salt until just combined. Transfer to a serving dish and top with the reserved onions. Chill for at least an hour before serving.
Maui Onion Dip TS

You can make and chill this dish up to 2 days in advance.

Thursday, July 16, 2009

Say hello to my little friend

John called me out into the yard early one morning.

He found this guy (or girl, we didn't check) hanging out in my succulents.

Frog hand

Luckily I'm not one of those girly girls who is squeamish about bugs or reptiles or even spiders, in fact, I kinda dig on on the creepy crawlie things I find in my yard.

Hell, it's my husband and our friend Mitchell that are terrified of spiders. I find the occasional arachnid fascinating.

This little cutie made me smile.

I liked the feel of his little suction cup tooties against my fingers.

He seemed kinda sluggish, like he needed a good nap.

I placed him back on the pot from whence he came and let him do his thing.

Frog bowl 2

We went out a few hours later to see if he was still there, but he hopped away somewhere.

Frog bowl

Maybe he'll be back.

Tuesday, July 14, 2009

Chocolate Chip Pretzel Bars

Choc Chip Pretzel Bars CU

During some of my relaxing time off I actually did a good bit of reading and catching up on my magazine subscriptions. There were a few lazy days that I sat in the gazebo, put my feet up and read my copies of the various foodie mags that were stockpiling themselves up on end tables. There was a mountain of them I tell ya.

I often will call out the names of recipes that I find interesting and announce them to whoever is around me at the time. Most of the time my announcements are met with “uh-huh” and “okay’s” and once in a great while I’ll even get a “sounds good”. Let’s just say the rest of my family doesn’t get as excited as I do with the prospect of a new recipe.

This was not the case with this recipe. I mumbled out “Hmm Chocolate Chip Pretzel Bars” and my husband, who usually nods or grunts actually said, “I love anything that’s sweet and salty like that”. Wait, did I actually hear a coherent sentence?? I know I sound like the teachers on Charlie Brown to him when I have my face buried in a foodie magazine “Wah wah waaaa, wah waaa wah”. Did he actually listen to the words that were coming out of my mouth?

It was true. There were no nods, no grumbles, no grunts, not even a heavy sigh.

I was amazed.

Naturally after receiving such an enthusiastic response, I just had to make these for him.

Choc Chip Pretzel Bars on table

Chocolate Chip Pretzel Bars
Printable recipe
2 cups all purpose flour
1-teaspoon baking soda
½ teaspoon salt
1 ½ sticks of unsalted butter, softened
1-cup light brown sugar
½ cup granulated sugar
2 large eggs
2 teaspoons vanilla
1 – 12 ounce bag bittersweet chocolate chips
1 ½ cups mini pretzels, coarsely chopped
2 tablespoons chocolate sprinkles

Preheat the oven to 350. Line a 9x13 inch metal baking pan with parchment paper allowing overhang on the two long ends.

In a bowl, whisk the flour, baking soda and salt. In a large bowl, using a mixer, beat the butter with both sugars at medium speed until light, about 1 minute. Beat in the eggs and vanilla. At low speed beat in the dry ingredients. Stir in the chips and pretzels.

Choc Chip Pretzel Bars VCU

Spread the batter in the pan and top with the sprinkles. Bake for 30 minutes, or until golden brown. The center will still be a little gooey. Transfer the pan to a rack to cool completely.

Run the tip of a knife around the side of the pan, and lift the bars out using the parchment paper. Cut into squares and serve.

Choc Chip Pretzels Bars TS

These bars can be stored in an airtight container at room temperature for up to 2 weeks.

Saturday, July 11, 2009

Sliders

Sliders trio 1

Here in Rhode Island we don’t have an In ‘n Out Burger, a Chick-fil-A, a Jack in the Box, Hardees, Arbys, or a Sonic (much to my husbands disappointment). Heck we had one Krispy Kreme and it went out of business. I’ve read about all these restaurant chains on food message boards and blogs, and the only one I’ve ever been to was a Sonic when we were in Pennsylvania. (The strawberry limeade was good. The onion rings – eh). So I’m sure it will come as no surprise after reading that list that we don’t have White Castle. I never even knew White Castle burgers existed until I saw the movie Harold & Kumar Go to White Castle. Isn't that pathetic?

A few years ago I started to see the White Castle sliders pop up in the frozen food section of my local mega-mart. I don’t buy frozen pre-made burgers, so a White Castle burger still never made it to my table, enough though I loved the idea of a little burger grilled with a layer of onions and topped with a pickle. I love onions.

So sliders are “in” now. I see them on restaurant menus; heck even the late Billy Mays was hawking a Big City Slider Maker on TV. Talk about the mother of all unitaskers.

I knew one of the talented bloggers I follow would eventually come up with a great recipe for delicious sliders that I could make at home, and they did. Thanks to Big Red Kitchen, you too can make these cute little burgers right in your own little kitchen (and they are easy too).

Sliders trio

Sliders
Recipe from Big Red Kitchen.
Printable recipe
½ cup dried onion flakes
2 pounds ground chuck (80/20 ground beef)
½ teaspoon seasoning salt
6 slices cheddar cheese
24 small party rolls or slider rolls
24 dill pickles

Evenly spread the onions on the bottom of a 9x13 inch-baking dish. Gently press the ground beef on top of the onion flakes. Press evenly, making one giant pattie. Sprinkle with seasoning salt. Bake at 400 for 20 minutes. Using a paper towel, pat the excess grease from the top of the ground beef. (My note - there was way too much grease to pat these with a paper towel. I ended up pouring the grease into an old pickle jar while my husband held the hamburger with with a spatula so it wouldn't fall out. Worked out pretty well). Top with cheddar cheese and return to the oven for 2 minutes, or just enough to melt the cheese. (I didn't return these to the oven, the heat of the burger melted the cheese). Remove from the oven and let stand for 5 minutes. Cut into 24 patties.

Arrange the bottoms of the rolls on a large platter and using a spatula, place the patties on the bottom of the rolls. Top with a dill pickle if desired, then slap a top on those bad boys. Serve immediately.

Slider Solo

Note: BRK stored these upside down in an airtight container in the refrigerator. This will prevent the bottom bun from getting soggy from the onion layer. To reheat, place a few on a microwave safe plate and heat for 20 seconds, and then check at 5-second increments after that until warm.

Thursday, July 9, 2009

One

John walked in the house this morning cupping this one lone cherry tomato in his hand.

one lone tomato 1

Since our sunny days have been very limited (we're talkin' 5 tops in the last month) we thought our tomatoes would never ripen.

one lone tomato

This little guy gives me hope. Come on sunshine.

Monday, July 6, 2009

Strawberry Rhubarb Crisp

Strawberry Rhubarb Crisp

I seem to be on a roll of making the most popular food blog recipes this week. First it was the carbonara and now it’s strawberry rhubarb crisp.

I’m fortunate to work someone who has an overabundance of rhubarb plants. He can’t give the stuff away fast enough. Last week he brought in a huge bag of freshly picked stalks. So much in fact that I had plenty to make this rhubarb crisp with and a whole bunch more to freeze for later use.

Strawberry Rhubarb Crisp Spoon

I know rhubarb is one of those foods that not everyone likes. It’s not the bacon of the food world, it more like, well the rhubarb of the food world, for lack of a better example, lol. Botanically speaking, rhubarb is a vegetable, yet we use it in recipes as a fruit.

I love its tartness. I especially love it when paired with other sweet fruits like blueberries, or cherries, or in this case strawberries. I’m the only rhubarb lover in my house, so I will share the rest. My rhubarb supplier always gets to taste the finished product too.

I think that’s why he keeps bringing me so much rhubarb.

Strawberry Rhubarb Crisp
Printable recipe
4 cups rhubarb, cut into ½ inch pieces
1 cup fresh strawberries, sliced
2/3 cup flour
1 cup granulated sugar
½ cup packed brown sugar
zest from one lemon
10 tablespoons cold unsalted butter, diced
1 cup old fashion oats

Preheat the oven to 350. Even divide the rhubarb into 8 ramekins or any other small making cups.

Combine the flour, sugars, cinnamon and lemon zest in a large bowl. Cut in the butter using a pastry blender. If you don’t have a pastry blender you can use two forks to cut in the butter. Blend until the butter is pea like in size. Toss in the oats and crumble the topping over the strawberries and rhubarb. Go ahead and really pack it on. The crumbly topping is the best part in my opinion.

Bake until the topping is browned and the filling is bubbling, about 40 to 50 minutes. Serve warm, and I won’t tell anyone if you decide to put some vanilla ice cream on top either.

Strawberry Rhubarb Crisp Spoon1

Strawberry Rhubarb Crisp empty

Thursday, July 2, 2009

Happy Independence Day.

Taking a few days off to relax and be a lazy bum.
I've got some cooking to do for the 4th, but not too, too much.

The 4th of July is about grillin' and chillin' after all, so I'm going to take advantage of the lounge chair in the yard and actually lounge
in it for a change. John is the grillmaster, so all I have to worry about is sides and some fabulous desserts.

I plan on catching up on my reading, working a bit in the garden,
and spending some long nights with my family and friends by the fire pit.

I might even throw in a Margarita or two.


Enjoy your festivities.

Our yard 2009-9


Happy 4th!

Wednesday, July 1, 2009

Summer is bustin' out all over.

Everything finally seems to blooming and growing and flourishing here in New England.

I took my camera out, walked around the yard and snapped a few photos.

Clematis.

Our yard 2009-1

There are hundred upon hundreds of blooms on this plant.

Every year it gets bigger and bigger. I love it.

This is my mandevilla. It's slowly climbing up this trellis.

Our yard 2009-3

Here's one perfect bloom from the mandevilla.

Our yard 2009-2

My little succulent garden.

Our yard 2009-4

I love buying nasturtiums before they bloom so it's always a surprise as to what color it's going to be.

This year it's red.

Our yard 2009 - 5

Lambs Ear.

Our yard 2009-6

If you've never felt a lambs ear (the plant not a real lambs ear) you just can't imagine how incredibly soft this plant is.

Even though I love the bursts of color in the yard, I love plants that stay green all season long too.

Our yard 2009-7

Ferns are some of my favorites.

Our yard 2009-8

Mosses too.

Our yard 2009-18

Oh and I can't forget the silver mound.

Our yard 2009-20

This is the view down my driveway.
I like things kinda free flowing and wild.

Our yard 2009-10

Coleus have always been a favorite of mine.
I love all the different colors that they come. in.

Our yard 2009-17

Here's a couple of mushrooms hiding out in the lavender.

Our yard 2009-11

This little white chair sits in one of my favorite corners of the yard, nestled among the tiger lilies.

Our yard 2009-12

Our yard 2009-13

We love decorating the yard for the 4th of July.
We have flags all over.

Our yard 2009-19

Our yard 2009-16

Little bursts of color creeping between some rocks.

Our yard 2009-15

There's a few stone critters hanging out too.

Our yard 2009-14

Here is my most favorite flower of all.

My hydragena that John bought for me 3 years ago on Mothers Day. The plant was in bad shape and I thought for sure that it wouldn't make it till the next year, but much to my surprise, it grew and flourished and is now a huge plant filled with dozens upon dozens of beautiful blue blooms.

I adore this plant.

Our yard 2009


I picked up another one this spring and it's getting ready to produce a bloom. Looks like it's going to be a pink one (yes I know it's the acidity of the soil that changes the color). I'll snap a pic of that when it's ready.