Tuesday, September 27, 2016

Homemade Bisquick

Hoem Made bisquick 1

I've been making a lot of mixes over the past 6 months or so. It's all in an effort to eat less processed foods and keep nasty chemicals and ingredients that aren't good for us out of our diet.

I try. I mean that whole heartily. I try to make things from scratch. I try and buy organic. It's not always easy but I'm doing what I can. There are so many products that I no longer buy anymore. It's very evident by my coupon holder. It used to be chuck full of coupons, now, not so much. My shopping list consists of staples that I make into the products I used to buy. It's time consuming I have to admit, but not horribly so, and because I made a commitment to myself to live this way, I don't mind very much at all. I'll spend a Sunday morning making up a few mixes then I'm good for the next few months or more.

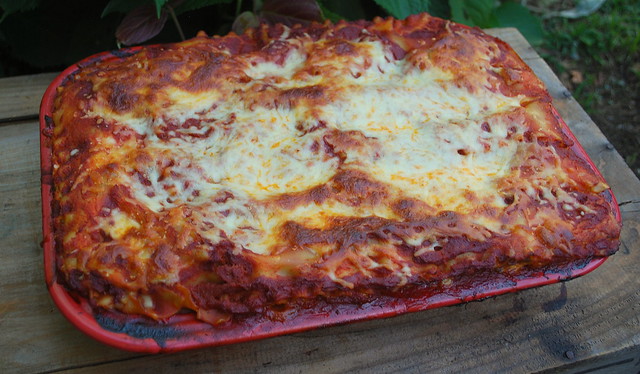
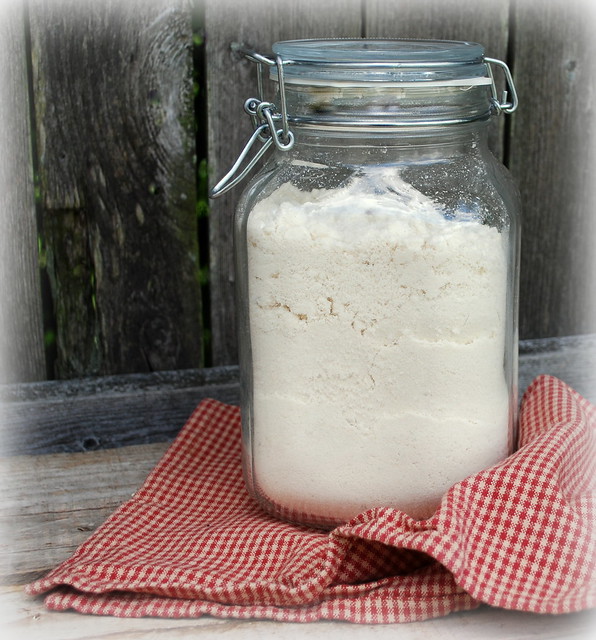
One of the products that is no longer in my cupboards is Bisquick. I didn't use it a lot, but I did reach for that box from time to time and now that it's casserole season I ran across quite a few recipes that I wanted to try but didn't want to use the boxed stuff for. Homemade Bisquick to the Rescue!

A little time in the kitchen once a month or so can not only saves you money, it makes you feel better about what you are feeding your family. 4 ingredients, that's all you need to make it yourself!

Homemade Bisquick
recipe from Lisa@The Cutting Edge of Ordinary
PRINTABLE RECIPE
5 Cups All Purpose Flour
3 Tablespoons Baking Powder
2 Teaspoons Salt
1 Cup Shortening

In a large mixing bowl, combine the flour, baking powder, and salt. Whisk to combine. Cut in the shortening. You can use a pastry blender but I just used my fingers to get mixed in really well. Sift all of the flour and store in an airtight container. Use the same as you would use Bisquick in any recipe. You can skip the sifting part, which can be time consuming, but I think it really blends it all together well. Store in an airtight container for up to 6 months.

Friday, September 23, 2016

Apple Crisp Apple Pie

Apple Crisp Apple Pie 2

This pie....THIS PIE! It's so damn good. It's not your typical apple pie. It's a cross between an apple crisp and traditional apple pie. Warm cinnamony apples nestled in buttery oats and fall spices topped with a crunchy brown sugar and more oats. Oh so good.

I patiently wait for apple season to arrive so I can start baking. I love autumn! Like many people it's my most favorite season. I love it all, the weather, the food, the comfy clothes, socks, blankets. It's truly my season.

Apple and pumpkins are always a big part of these next few months. I can't wait to fill these pages with all the fall food I know you'll love as much as I do.

Apple Crisp Apple Pie 1

I don't like to bite into big thick pieces of apples in my pie. I like my apples cooked through. If you like a pie with more of a bite that I would reduce the time that you cook the apples in the skillet.

Anyway you like it, you must make this pie. It won't hurt if you top it with a big scoop of vanilla ice cream either!

Apple Crisp Apple Pie 3


Apple Crisp Apple Pie
adapted from a recipe at Dinner then Dessert
PRINTABLE RECIPE


1 pie crust

Step 1 - In a skillet combine:
8 cups apples, peeled and thinly sliced (I used a combination of Granny Smith and MacIntosh)
2 tablespoons lemon juice
⅔ cup sugar
¼ teaspoon ground cinnamon
4 tablespoons unsalted butter

Step 2 - In a bowl add:
¾ cup granulated sugar
¼ cup light brown sugar, loosely measured
2 teaspoons vanilla extract
2 tablespoons honey
1 teaspoon cinnamon
¼ teaspoon allspice
¼ teaspoon ground cloves
¾ cup all-­purpose flour
¾ cup rolled oats
1 large egg

Step 3 - For the crumble topping:
3/4 cup flour
1/4 cup + 2 tablespoons granulated sugar
1/4 cup + 2 tablespoons light brown sugar, packed
½ teaspoon kosher salt
1/2 cup rolled oats
1 stick cold unsalted butter, diced

Preheat oven to 375 degrees. Place the pie crust in a pie pan and set aside.

For the filling:

Place all the ingredients in Step 1 in a large skillet and cook on medium heat for 8-10 minutes or until the apples are wilted and tender. Place the apples in a large bowl and let them cool for a bit. Once cooled a bit add in all the ingredients in Step 2. Mix well and place in the pie crust.

To Make the Crumble:
Combine the crumble topping ingredients until the butter is pea size, you can use your hands or a pastry cutter.Top the pie with the crumble filling. Bake for 50 minutes. Let cool for 15 then dig in!

Tuesday, September 20, 2016

Honey Ginger Balsamic Dressing

Honey Ginger Balsamic Dressing 1

I think people get tired of eating salad at home because for the most part they stick with the same old thing...lettuce, onions, tomatoes, croutons, etc. Boring salad can turn you off pretty easily. I always try and spice my salad up with things like, great cheese (Gorgonzola or really good sharp cheddar being 2 favorites), I'll add crunchy tortilla strips, french fried onions, bits of leftovers (thinly sliced steak and leftover chicken are two we use a lot). I add apple, pears, walnuts, almonds, hard boiled eggs, anything to make a salad more exciting and get you to actually look forward to eating salad. A great dressing is a huge part to a wonderful salad so I usually make my own. In the past I've made an amazing Teppanyaki Style Ginger Dressing, and a Herbed Ranch Dressing that really send your greens over the top.

This time I decided to make a dressing that had all of the things I wanted in it. I like my dressing with a bit of sweetness so I set out to make my own.

After a few hours of playing mad scientist in the kitchen, I got what I think is the perfect balance in a salad dressing. A little tart, a hint of sweetness with the tang of 2 different kind of vinegars.

I really prefer to make my own. I know what goes in it and I know I'm not adding any ingredients I don't want it in. The only store bought dressing I really like are actually from BJ's Wholesale. They carry a Balsamic Dressing and a Cesar dressing that are both organic. Good stuff when I'm in a pinch, but for the most part, I make my own.

Feel free to experiment with the ingredients making this "your" dressing!

Honey Ginger Balsamic Dressing

Honey Ginger Balsamic Dressing
recipe from Lisa@The Cutting Edge of Ordinary
PRINTABLE RECIPE
2 medium cloves garlic, minced
1 tablespoon finely chopped or grated ginger
1 shallot, minced
1/4 cup rice vinegar
1/4 cup balsamic vinegar
1/2 teaspoon Dijon mustard
2 tablespoon honey
1 tablespoon light brown sugar
1 tablespoon soy sauce
1/3 cup extra virgin olive oil
1/4 cup canola oil
salt & pepper to taste

I use mason jars for all my dressing. Just throw everything into the jar, shake it up and serve. Keep refrigerated.

Monday, September 12, 2016

Spinach, Feta and Olive Pinwheels

Spinach, Feta and Olive Pinwheels 1

This is truly a recipe that I just threw together. There was no thought out plan to make these. I didn't purchase any special ingredients. I just pulled all the ingredients together and baked them.

Cooking and Baking is therapeutic for me. I suppose some people with much more talent than me paint, or draw or create something beautiful, but I cook and bake. It's what I do.

Saturday morning my friend Eva called me and told me that her sister had died. Kathy was 52, the same age as me. She had a husband and 2 kids, just like me. She got cancer, just like me. She died. I lived. I don't mean to sound crude or harsh, those are the facts. I got to live and she died and it makes me so angry inside and reaches a place of such deep sadness in me that I can feel it in my bones. You know when people say to count your blessing every day? I do. I really do that. I am grateful for every moment I get to be here. I don't think anyone who hasn't lived through a life threatening ordeal can truly feel that in their soul. I could have died but I didn't. I am here and she isn't and it breaks my heart for her family and everyone whose life she touched.

We were out yard sale-ling when I got the call and just like that I was a puddle of tears and John knew that it was time to go home. So I kind of wandered around the house and tried to occupy my mind and it just naturally went to the kitchen.

It's therapeutic for me. The chopping, the measuring, the rolling of the dough, all of it. It let me escape the sadness my heart felt if only for a bit.

This one is hitting me so close to home. I'm struggling with this. I felt like this when Joey Feek passed away. I feel like this again and I'm so angry that cancer has taken someone that was so loved and cherished from their family. So it might seem strange to post a recipe in the middle of this deep sadness I'm feeling, but it's just what I do. It's how I cope.

I had a box of puff pastry in the fridge and I literally just looked around to see what I could throw together and this happened.A little pesto, spinach, fresh feta and a sprinkling of olives. I doubled this batch. There was plenty left of all the ingredients to make two.

Spinach, Feta and Olive Pinwheels 2


Baking always makes me feel better. I'm happy to know that Kathy tasted quite a few of the things I baked over the years. I want to always remember her smiling face biting into a piece of whatever I made.

She was so loved.

14291891_10155216211910299_7827282510448827827_n(2)


Spinach, Feta and Olive Pinwheels
recipe from Lisa@The Cutting Edge of Ordinary
PRINTABLE RECIPE
Yield 20 appetizers
I doubled the batch and got 28, this recipe is for 1 batch
1 sheet frozen puff pastry, thawed
1 tablespoon pesto
1- 10oz package frozen spinach, thawed and squeezed dry
Fresh Feta
Chopped Black olives

Pre-heat the oven to 400. Unfold the puff pastry and roll it out just a bit on a floured surface. Spread the pesto thinly over the pasty leaving a ½ inch border. Pesto is powerful, so keep it very thin. Sprinkle with spinach, feta and olives, covering the surface within a 1/2 inch of the border. Roll up one side to the middle of the dough: roll up the other side to the middle so the two rolls meet in the center.  Pinch the seam together a bit, gently flip it over and put it in the fridge for a bit, at least a 1/2 hour to firm up before cutting. Using a serrated knife cut into ½ inch slices.

Place on a parchment lined sheet pan. Bake for 15 – 18 minutes or until puffed and golden brown. Serve warm.

Friday, September 9, 2016

Lasagna - my way.

Lasagna 2

I've been making this lasagna for almost 30 years. When I was a young cook, and a new homeowner, this was my go-to dish because:

1) It feeds a crowd
2) It's really delicious
3) I could make it a day in advance
4) It was one of the few dishes that I could make

That was many, many years ago. I have quite a few dishes under my belt at this time but this lasagna is something I make a few times a year.

Over the years I've forced myself to write down recipes that I just kind of made without writing anything down.. In a way that is how this blog started oh so many years ago. I needed to have a place where I could share my recipes while also documenting them for my own personal history. So, it's finally all written down and it's comfort food at it's finest.....cheesy and meaty and gooey. Everything you want a lasagna to be!

Lasagna

Lisa's Lasagna
recipe from Lisa@The Cutting Edge of Ordinary
PRINTABLE RECIPE
1 pound lasagna noodles
2 pounds ground beef or turkey or a mixture of both.
1 large onion, chopped
Garlic, chopped – to taste. I use 5 – 6 cloves. We are garlic fiends. You can use less.
Large container (32oz) whole milk ricotta cheese
2 eggs
12 slices Provolone cheese cut in half
1/2 cup Pecorino Romano or Parmesan grated cheese
4 cups shredded Mozzarella cheese
1 tablespoon Italian seasoning
Fresh chopped parsley
Fresh chopped basil
Sauce – I usually make my own sauce, but in a pinch jarred will do. You will probably end up using 1 large jar or 2 small jars.

I start my lasagna the way I start many dishes, by cooking up some onions and garlic in some good olive oil. I do a fairly large chop on the onions and then cook them in about 3 tablespoons of olive oil, just until they are translucent. Add the ground beef or turkey, or both and cook until meat is no longer pink inside. Drain any grease from the mixture.Set aside.

I don't boil my lasagna noodles. I find that most times they come out overcooked and then when they go in the oven, they become mush. This is what I do. I boil some water in my kettle. I place the whole package of noodles in a 9x13 baking pan and pour enough boiling water over them so they are covered. After I pour the water over, I take a fork and separate any noodles that are sticking together so that the water gets in between each noodle. Let them sit for 10 minutes.

In a large bowl combine the ricotta, 2 eggs, Pecorino Romano cheese, Italian seasoning and the herbs. Mix gently. I don’t measure any of the herbs. I just chop them up and kind of go with what looks good to me. Set aside.

The assembly:

I kind of make an assembly station for my lasagna making.

I line up, in this order…..the lasagna noodles, your baking dish, then the sauce, the ricotta mixture and finally the meat mixture. I start by putting a little sauce in the bottom of the pan. This prevents the noodles from sticking. Put down one layer of noodles (just grab them from the water with a fork and shake off the access water). Spread on the ricotta mixture, a layer of mozzarella cheese, and 8 half slices of provolone. Just scatter them over the top. Put a thin layer of sauce over the top. Not too, too much. Repeat layers. I usually get 3 layers from one box. The number of layers will depend on the size of your pan. End with a layer of noodles on top. Sprinkle with mozzarella.

Cover with aluminum foil that has been sprayed with a little cooking spray or your cheese will stick to the foil. Heat in a 375 degree oven for 40 - 50 minutes, or until hot and bubbly. IMPORTANT!! Place on a foil lined cookie sheet in case of spills and bubble over! I remove the foil at the last 15 of cooking so the edges get nice and crunchy…the best part! Let sit for 15 minutes before cutting.

I usually serve this with a big salad and some garlic bread. You can make this a day in advance, just take it out an hour before baking and add about 10 minutes to your cooking time.

Thursday, September 1, 2016

Taco Seasoned Oyster Crackers

Taco Seasoned Oyster Crackers 2

My guys love these seasoned oyster crackers. They just scream football to me because that's the season that they are most requested. My husband is a happy man when he has a beer in his hand, football on the screen and a bowl of these crackers in front of him.

Many years ago my mother-in-law gave me the recipe for these Italian Seasoned Oyster Crackers pictured below. These are a favorite too. Click here for the recipe

Seasonsed Oyster Crackers 1

All you need are a few bags of crackers and a few spices and you have an easy snack that everyone just can't stop eating.

They are really addictive.

I kept seeing quite a few recipes for taco seasoned crackers popping up on Pinterest but I decided to make up my own. All my guys love anything taco so I knew these would be a hit...and they were.

Taco Seasoned Oyster Crackers

Taco Seasoned Oyster Crackers
PRINTABLE RECIPE
2 packages (10 - 12 ounces each) oyster crackers
3/4 cup canola oil
1 envelope taco seasoning (or make your own!!)
1/2 teaspoon garlic salt
1/2 teaspoon dried oregano
1 teaspoon chili powder

Preheat the oven to 350. Place the crackers in a very large bowl. Place the oil in a 2 cup measuring cup and add in the remaining ingredients. Stir or whisk to combine. Pour over crackers and gently toss to coat.
Bake on a parchment lined sheet pan 10-15 minutes, stirring once while they bake. Cool and store in a covered container.