Friday, August 26, 2016

Sugared Walnuts

Sugared walnuts 1

I make a mean salad. I'm going to toot my own horn and tell you that because it's what I hear from most people when they have salad at my house. I eat a lot of salad so I try and make my salads as interesting as they can be for a bowl of greens.

I'll add in almonds, pears, apples, mandarin orange slices, bleu cheese, avocado etc. For a bit of a crunch I'll add crispy tortilla strips, home made croutons, chow mein noodles. For some protein I've been known to throw in chopped boiled eggs, salmon, bacon, leftover steak strips, just about anything can go into a salad really. It's a great place for leftovers.

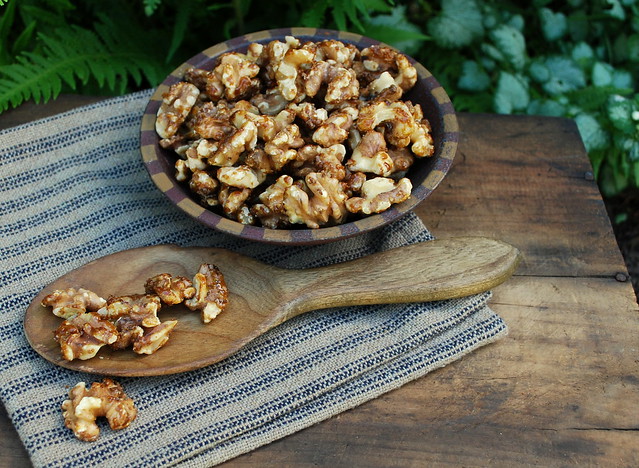
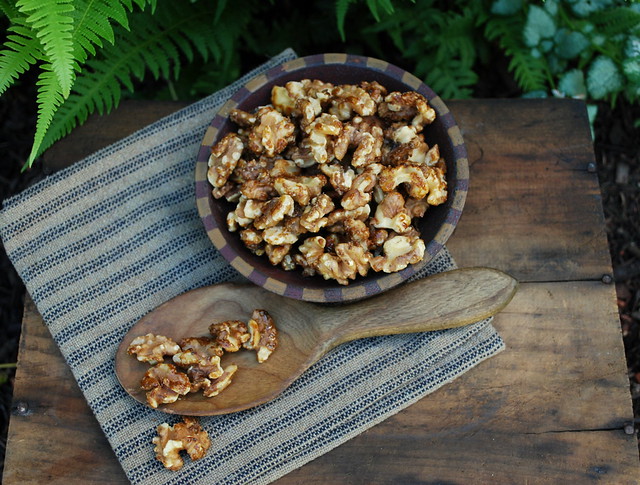
One of the things that I think takes my salads over the top is my dressing. I love to make my own. I'll be sharing some of my favorites with you all soon but first I wanted to share my Sugared Walnuts with you. They sound fancy don't they? They are so easy. 3 or 4 minutes in a pan and you have crunchy, nutty salad topping made with 2 ingredients that is a snap to throw together.

These walnuts combined with bleu cheese crumbles is the perfect combination for me. Salty, sweet and creamy in one bite. So good!

Sugared walnuts

Sugared Walnuts
recipe from Lisa@The Cutting Edge of Ordinary
PRINTABLE RECIPE
2 cups walnut pieces
1/4 cup light brown sugar
parchment paper

Heat a large skillet over medium heat. Place a sheet of parchment on your counter. Place the walnuts in the pan and sprinkle with the brown sugar. Using a spatula, toss the walnuts gently so the sugar coats them. If you need to put a little more sugar in, now's the time. As soon as the sugar is melted remove from the pan on to the parchment and let cool. Break up any walnuts clusters. Store in glass or mason jar.

Tuesday, August 23, 2016

Garlic and Shallot Refrigerator Dill Pickles

Garlic Shallot Dill Pickles 2

I'm afraid to do an inventory of canning supplies at my house because I fear I will find out exactly just how many I have. Sometimes my canning jar hoarding comes in handy. A perfect example of this was last week when I went to my local farm stand and picked up a bunch of pickling cucumbers. I knew I had some kind of wide mouth jars that would work and low and behold I had picked up some Ball Wide Mouth 1-1/2 Pint. I love these jars. They hold 24 ounces and are a taller than the average canning jar. They are my new go-to jar.

I love to use mason jar because not only are they adorable, they are a great re-usable resource. I think everything tastes better when it's been stored in glass. I use mason jars to store all sorts of stuff in my pantry. They are cheap too! Give me a case of mason jars and a label maker and I'm ready to organize!

These pickles are super easy to make (you don't need to give them a dip in a water bath!) All you need are some pickling cukes and a few other ingredients and you'll have home made refrigerator pickles in a snap!

Make sure you use dill SEED not dill WEED!

Garlic Shallot Dill Pickles 1

Garlic and Shallot Refrigerator Dill Pickles
Recipe from Lisa@The Cutting Edge of Ordinary
PRINTABLE RECIPE
For each jar you will need:
3 pickling cucumbers, sliced thin
2 tablespoon kosher salt, divided
1/2 teaspoon sugar, divided
3 teaspoons dill seed (NOT Dill WEED, SEED!)
2 small shallots, sliced thin
2 cloves garlic, sliced thin
Distilled white vinegar
Filtered water

Start by layering the ingredients in your jar. I used tall wide mouth pint jars for mine. Wide mouth jars are much easier to work with than the traditional canning jar. I used a mandolin to slice my cucumbers, makes the job very easy!

Place the half garlic and shallots in the bottom of the jar then layer with cucumber slices. A mandolin works very well for slicing the cucumbers. Put 1 1/2 teaspoons of the dill seed on top and a 1/4 teaspoon the sugar, and 1 tablespoon of the salt on top of the cucumbers then repeat the layer ending up with more cucumbers on top. Pour the vinegar a 1/3 of the way up the jar then fill it to the top with filtered water. Seal tightly, refrigerate. It's best to wait at least 24hr before digging in. These should keep for up to 2 months in the fridge (if they last that long!).


Friday, August 19, 2016

Roasted Eggplant

Roasted eggplant 2

Sometimes you just crave a certain food you grew up with. I love eggplant. It was always something we had in the house growing up. As I got older I realized that some of the foods that I grew up eating were seldom on the tables of many of my friends. They loved to come to my house cause my Mom and Gram were always cooking and they got to eat! I now realize how lucky I was to be exposed to all the foods my Mom, Gram and Nonna cooked.

This recipe is one my Mom makes all the time for my Dad. It's simple and rustic like most of the best recipes are. You can have this in the oven in under 5 minutes.

I had a craving for it so I cooked myself up a batch. Let it get mooshy and squishy in the oven so it almost falls apart when you pick it up. Pair this with a nice crusty bread = heaven.

Roasted eggplant 1

Roasted Eggplant
recipe from Lisa@The Cutting Edge of Ordinary
PRINTBALE RECIPE
Eggplant
olive oil
Italian seasoning
salt & pepper
Parmesan cheese

No measurements! Rustic and simple. Slice the eggplant lengthwise into 1/4 inch to 1/2 inch slices. The thicker you cut it, the longer it will cook. Don't make it too thin or it will fall apart in the oven. You can peel the eggplant, or leave the skin on. Your call.

Line a baking sheet with parchment. Brush both sides of the eggplant with olive oil, sprinkle one side with Italian seasoning and salt and pepper. Roast at 400 for 20 - 30 minutes or until the eggplant is tender. Sprinkle with parmesan and serve with crusty bread to sop up all the goodness!

Tuesday, August 16, 2016

Old Fashioned Blueberry Cobbler

Blueberry Cobbler1

We pick a lot of blueberries every year and I try to make something new with them at least once or twice. A few weeks ago I brought you one of the best cakes I've ever eaten.....Blueberry Muffin Cake. Click here for the recipe.

Although I froze a bunch of blueberries, I always keep a gigantic bowlful at the ready. I doubled this recipe and used 8 cups of blueberries in this. I know that's a lot, but you can certainly make it as described below and not double it like I did but I was serving it to guests after dinner so I knew a little 8x8 pan would not be enough. Was I ever right! We destroyed that cobbler. It was just perfect. Not overly sweet and that topping! It was just heaven, like a cross between a really good biscuit and a muffin top.

I don't have a source for this recipe. Like so many of my recipes I had printed it out from somewhere and put it in my blueberry file long ago. I re-visit that blueberry folder every July.

You should have seen the faces of my dinner guests when I whisked off into the backyard with this cobbler to photograph it. They sure were glad when I returned with it. I served this warm with vanilla ice cream and it was happily devoured by all!

Blueberry Cobbler


Blueberry Cobbler
Recipe from Lisa @ The Cutting Edge of Ordinary
PRINTABLE RECIPE
For the berries:
4 cups fresh or frozen blueberries
½ cup sugar
3 tablespoons corn starch
2 tablespoons lemon juice
½ teaspoon ground cinnamon
¼ teaspoon ground nutmeg

For the topping:
1 cup flour
2 teaspoons grated lemon peel
¾ teaspoon baking powder
Pinch salt
¼ teaspoon baking soda
3 tablespoons cold butter
¼ cup sugar
¾ cup buttermilk

In a large bowl combine the berries and the rest of the ingredients for the topping. Gently stir to combine. Place in a greased 2 quart baking dish. If doubling this recipe use a 9x13 or equivalent sized pan.

For the topping:
In a bowl combine all the ingredients except for the butter and buttermilk. Cut the butter into the batter until it resembles coarse crumbs. Stir in the buttermilk until just moistened. Drop by tablespoonfuls onto the blueberries.

Baked uncovered at 375 for 30 -35 minutes or until golden brown. Let it sit for 15 minutes before serving. We ate ours warm with vanilla ice cream – delicious!

Wednesday, August 10, 2016

Apple Zucchini Bread

Apple Zuicchini Bread

Every July and August we are overrun with zucchini. Every year I say I'm going to cut back on the amount of zucchini I'm going to plant and every year I plant the same amount or more and I'm giving it away and making zucchini everything.

I love it, so that's a good thing, and it forces me to find new and creative ways to cook and bake with it, and that is also a good thing. So off I went looking for something a little different that I could use with my latest harvest.

If we aren't picking everyday and we miss a day or two they can grow to epic proportions! We're talking baseball bat sized in just a few days so we try to be diligent in picking so they don't get so big. If they do and I find myself with a mammoth zucchini I'll shred it with a box grater, ring out as much water as I can and freeze it so I can use it in the winter for baking. I'll have many bags nestled in between my pounds and pounds of blueberries.

I found this recipe crumpled up in between some other zucchini recipes. I have no idea who the original source was, but I'd like to thank him or her cause this is one delicious bread. The addition of grated apple gives it a sweet and unique flavor.

This recipe yields 3 loaves, two for you and one for someone else, or you just might want to keep all three!

Apple Zuicchini Bread 1

Apple Zucchini Bread
Recipe from Lisa@The Cutting Edge of Ordinary
PRINTABLE RECIPE
Makes 3 loaves
4 cups all-purpose flour
1 tablespoon baking soda
1-1/2 teaspoons ground cinnamon
1/2 teaspoon ground nutmeg
1/4 teaspoon salt
5 eggs
1-1/2 cups vegetable oil
2 cups sugar
1 cup packed brown sugar
1 tablespoon vanilla extract
2 cups shredded unpeeled zucchini
1 cup peeled and grated apples
1-1/2 cups chopped pecans or nut of your choice

In a large bowl, combine flour, baking soda, cinnamon, nutmeg and salt. In another bowl, beat eggs. Add oil, sugars and vanilla. Pour over dry ingredients; mix well. Stir in zucchini, apples and pecans (batter will be stiff). Spoon into three greased 8-in. x 4-in. loaf pans. Bake at 350° for 50-55 minutes or until done. Cool in pans for 10 minutes before removing to a wire rack to cool completely. Yield: 3 loaves.

Saturday, August 6, 2016

Cabbage & Onions (with bacon!)

Cabbage, onions bacon

No one in my house likes cabbage except me. I love cabbage. I love brussel sprouts too. They are just baby cabbages after all. I can't get enough of them. I rarely make cabbage because although I love it, I really don't want to eat a whole head of the stuff myself.

While we were chatting with our neighbor the other night he mentioned how his Mom would fry up cabbage and onions in butter and how much he loved it. Ha! I found a fellow cabbage lover! So what do you think I did the next morning? I went right out and bought a big old head of cabbage. Oh yes I did.

Instead of cooking it on the stove top I opted to cook it in the oven until it got tender. This method produced a really moist and perfectly cooked cabbage. All I needed was some bacon, cause come on, cabbage and bacon are just meant to be. ONIONS! Oh how I love my onions. My little trick with onions is that I often thrown in just a little bit of brown sugar with them while they cook. This gives them a sweet little edge in a dish like this. I cooked up a boatload of onions and ta da.....my beloved cabbage and onions was ready to eat!

When it was finished I took a photo and texted it to my neighbor. An hour later he was outside my front window with an empty bowl in his hand. I kid you not. I happily shared with him.

Cabbage, onions bacon 1

Cabbage & Onions (with bacon!)
recipe from Lisa@The Cutting Edge of Ordinary
PRINTABLE RECIPE
1 large head of cabbage
olive oil
2 large sweet onions, sliced
1/4 cup brown sugar
1 stick butter (divided)
6 slices bacon, cut into small pieces

Core the cabbage and slice it in strips about a 1/2 inch wide. Toss the cabbage with enough oil to coat it. You don't want to saturate it, just lightly oil it. Place in a 9x13 inch baking dish and pour about a 1/2 inch of water in the bottom of the pan. Dot the top of the cabbage with 4 tablespoons of butter. Place the cabbage in the pan and cover with aluminum foil. Bake at 350 for 35 to 35 minutes or until the cabbage is tender. Take the foil off and cook an additional 10 minutes or until the water is evaporated. The cabbage might get a little brown in spots and that's totally ok.

While the cabbage cooks put the bacon pieces in a large frying pan and cook over medium heat until browned and crisp. Remove the bacon from the pan but leave the bacon grease in the pan. Place the onions in the pan and cook until they are slightly translucent. Add in the brown sugar and continue to cook the onions.

Take the cabbage out of the oven and place it in the pan with the onions. Place the remaining 4 tablespoons of butter in the pan and cook it for about 10 more minutes. You want it to have nice browned spots. Toss the bacon pieces back in and serve!

Tuesday, August 2, 2016

Healthier Double Chocolate Zucchini Muffins

Healthier Chocolate Zucchini Muffins

Sometimes you need to break free from the monotonous breakfast routine you're in and try something a little different.

I eat the same 3 or 4 things for breakfast every day. I try and stay away from carbs, I watch my sugar, I eat protein, I try and do everything right, but every once in awhile I crave a muffin and I know most muffins are full of sugar and carbs and really aren't good for me, so I went searching for a muffin that wasn't quite so bad for me and I found it in this scrumptious little muffin.

Healthier Chocolate Zucchini Muffins 2

These muffins are not overly sweet but still pack in a lot of flavor.

Healthier Double Chocolate Zucchini Muffins
adapted from a recipe at Ambitious Kitchen
PRINTABLE RECIPE
1 ¼ cup whole wheat pastry flour or white whole wheat flour
1/3 cup unsweetened cocoa powder
1 teaspoon baking soda
¼ teaspoon salt
2 tablespoons coconut oil
1/3 cup honey or agave nectar
1 teaspoon vanilla
1 egg
1 egg white
1 cup shredded zucchini (about 1 medium)
¼ cup unsweetened applesauce
½ cup milk
½ cup regular or mini chocolate chips

Preheat oven to 350 degrees F. Line 12 cup muffin tin with cupcake liners and generously spray inside of liners with nonstick cooking spray.

Squeeze shredded zucchini of excess water with a paper towel. This is important, so don’t forget!

In a medium bowl, whisk together flour, cocoa powder, baking soda, and salt; set aside.

In the bowl of an electric mixer, add coconut oil, honey, vanilla, egg and egg white; mix on medium-low until smooth and well combined. Add in zucchini, applesauce, and milk; mix again. Slowly add in dry ingredients and mix until just combined. Gently fold in chocolate chips.

Evenly divide batter into prepared liners. Bake 22-25 minutes or until toothpick inserted into middle comes out clean. After 5 minutes, remove muffins and transfer to wire rack to finish cooling. Enjoy!