Friday, July 12, 2013

Olive Oil Cake - Strawberry and Creams best friend.

Olive oil cake 2

I know this sounds gross. Olive Oil Cake. It just didn't sound right to me.

My mom had been making this for a few weeks cause my Dad is on a strawberry kick. He eats strawberries almost every night. She was buying the store bought little round sponge cakes. My Dad ate them but he was not thrilled with them. So she tried Curtis Stone's Olive Oil Cake.  When she told me she was going to make it, I was still a bit skeptical. I had seen other cakes made with olive oil but they never appealed to me. Dad LOVED it. He said it was the best cake he's had and that it is perfect with strawberries. Hmmm. I always imagined a soggy, greasy cake. (This is so not soggy or greasy). So she brings me a piece and he's right. This cake is fantastic. It's moist and light and nothing that you think a cake with 3/4 of a cup of olive oil should be.

My Dad's not really a sweet eater, so those little cakes did nothing for him. Besides who wants those little pre-fabed circles when you can have home made cake? So she's making this for him just about every week and he really loves it and now I do too.

Moist and delicious cake with a hint of orange and lemon. I'm telling you, this cake is fabulous!

Mom bakes hers in a 9x13. This recipe calls for a 9 inch cake pan. I think you can pretty much make it in any pan that you like, just check for doneness a bit earlier.

Olive oil cake


Olive Oil Cake
slightly adapted from this recipe at Curtis Stone
Non-stick olive oil cooking spray
1 1/2 cups all-purpose flour
2 teaspoons baking powder
½ teaspoon salt
1 cup granulated sugar
Finely grated zest of 1 orange
Finely grated zest of 1 lemon
3 large eggs
¼ cup whole milk
¾ cup extra-virgin olive oil

To make the cake: Position a rack in the center of the oven and preheat the oven to 350°. Spray a 9-inch round cake pan (or 9x13) with nonstick olive oil cooking spray. Line the bottom of the pan with parchment paper and spray the paper with non-stick olive oil spray.

In a medium bowl, whisk the flour, baking powder, and salt together.

In a large bowl, combine the sugar and the orange and lemon zest, then rub the mixture between your fingertips until it is moist and fragrant. Add the eggs and, using an electric mixer, beat on medium-high speed for about 5 minutes, or until pale and thick. Beat in the milk. Gradually beat in the olive oil. Using a wooden spoon, stir in the flour mixture just until blended. Spread the batter in the pan.

Bake for about 25-35 minutes (times may vary depending on the size of the pan you are using), or until a wooden toothpick inserted into the center of the cake comes out with moist crumbs attached. Let cool in the pan on a wire cake rack for 15 minutes, then invert the cake onto the rack and remove and discard the paper. Invert the cake, right side up, onto a cake plate. Serve with strawberries and cream or whatever combo you like!

Tuesday, July 9, 2013

Lilla Rose Flexi Clip Giveaway!

lila 1

It's hot here in New England. Really hot. Humid and sticky and very uncomfortable. I hate it. My hair frizzes. Doesn't matter how much product I use, it rebels against this oppressive humidity and all I want to do it get it up off my neck. Luckily I have a product that helps me with that problem.

It's not often that I find a product that I want to brag about.

It takes a lot for me to endorse something and really want to talk about it and share it with you all, so you know it has to be good.

I have thick, curly, medium length hair. I actually keep it a bit longer in the summer because I like to pull it up during these hot and humid moths in New England. The problem with hair like mine is finding something strong enough that will actually keep my hair up with falling out or breaking. I've snapped many elastic bands in my day and broke more barrettes than I can count. I pretty much gave up on finding anything that would actually work, then I received a Lilla Rose Hairclip from a giveaway that I won over at Chiot's Run. You can read Susie's story and see how much she loves this hair clip too. This is what she had to say about the Flexi Clip:

"It stayed in all day and there was no tight pony tail headache and no hair snags or knots. It’s so gentle, it has to be much easier on your hair than one of those rubber band ponytail holders which tend to cause breakage and split ends".

What Susie said is so true. I can grab a big ole bunch of my hair and this clip holds all of it up ALL DAY. It never falls out, never feels like it's pinching or digging into my scalp. It really works. Not to mention there are dozens upon dozens of styles to choose from.

lila

Beth from Lilla Rose contacted me asking me if I would like to do a giveaway. Would I? Of course I wanted to share this wonderful product with you all and give one of you a chance to win one!

The lucky winner can chose any Lilla Rose item up to a $16 value. (I strongly recommend the Flexi-Clip). You must be a new customer to Lilla Rose. This is one per household offer.

New customers can also purchase any 3 items and then contact Beth about getting a 4th item for free (up to $16 value)!!! Now is the time to stock up on these beautiful items!

lila 3

Head on over to Beth's site and check out all the beautiful Flexi styles! Click the shop now button to get started. There are so many beautiful styles to choose from.

Not sure what size to get for your hair type? This video will help you decide which hair clip is best.

What makes these clips so different? I'll let the peeps at Lila Rose tell you:

lila 2

I'm telling you, once you use this product you will never reach for another elastic band or any other hair clip again.

One lucky winner will be able to choose any item up to a $16 value!

Just let me know what is your most favorite thing about summer?

If you don't have a blog, please leave me email address to contact you (no email and I'll move on to the next name).

There are three ways to enter: (1) leave a comment on the blog (2) If you haven't already, go “like” The Cutting Edge of Ordinary on Facebook or (3) Already a fan? Just leave a comment here or on Facebook to let me know! Facebook comments will count as entries.


Giveaway ends on Monday, July 15th at midnight EST. Good Luck!

Monday, July 1, 2013

Lemon Blueberry Pound Cake

Lemon Blueberry Pound Cake.1jpg

This is the first year since I can't remember when, that I am not hosting a 4th of July party. I can hardly believe it. I think I have hosted 4th of July for the last 20 years. After the pig roast we are kinda partied out. We'll have Mom and Dad over and of course I will be making food, but I'm not cooking for a crowd and let me tell you...it feels pretty darn good.

We are lucky enough to live in front of a cul de sac that has a decent fireworks display literally in our back yard. We can sit under the gazebo and enjoy the show!

Even though there will be just a few of us, I will make a dessert, in fact, I might be making this dessert again because it was that good. If you are hosting the 4th of July bash or need to bring a dessert with you.....this is the cake. This cake is just perfect.

It's moist and bursting with a lemony twist. Don't even get me started on that glaze. It takes this cake over the top.

Lemon Blueberry Pound Cake

Lemon Blueberry Pound Cake
Recipe from Taste of Home
1/3 cup butter, softened (5 tablespoon + teaspoon)
4 ounces of cream cheese, softened
2 cups sugar
3 eggs
1 egg white
1 tablespoon grated lemon peel (I used the peel of 2 whole lemons)
2 teaspoon vanilla extract
2 cup fresh or frozen blueberries
3 cups flour, divided
1 teaspoon baking powder
½ teaspoon baking soda
½ teaspoon salt
1 – 8oz container lemon yogurt (I could only find a 6 ounces container, it worked)

Glaze
1 ½ cups confectioners’ sugar
¼ cup fresh lemon juice

Grease and flour a 10-in. fluted tube pan. In a large bowl, cream the butter, cream cheese and sugar until blended. Add eggs and egg white, one at a time, beating well after each addition. Beat in lemon peel and vanilla.

Toss blueberries with 2 tablespoons flour. In another bowl, mix the remaining flour with baking powder, baking soda and salt; add to creamed mixture alternately with yogurt, beating after each addition just until combined. Fold in blueberry mixture.

Transfer batter to prepared pan. Bake at 350° for 55-60 minutes or until a toothpick inserted in center comes out clean. Cool in pan 10 minutes before removing to wire rack; cool for 15 minutes.

In a small bowl, mix confectioners' sugar and lemon juice until smooth. Gradually brush onto warm cake, about one-third at a time, allowing glaze to soak into cake before adding more. Cool completely. Yield: 12 servings.

Note: For easier removal of cake, use solid shortening when greasing a fluted or plain tube pan.

Friday, June 28, 2013

Hello~

Hi everyone!

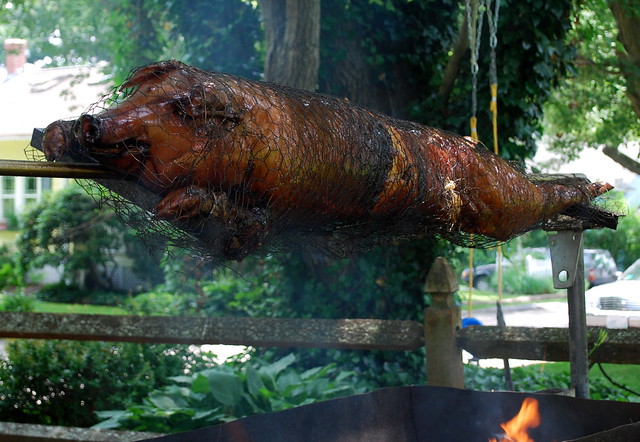
I've been absent for a bit as you can see. There was a temporary bit of crazy going on at my house. My son's graduation/pig roast/birthday celebration was a huge success. My anxiety over cooking the pig (mostly worrying that the weather would cooperate), was settled when we saw that the upcoming forecast was blue skies and temps in the low 80's. It was beyond perfect. We really couldn't have asked for a better day.

The pig, which was roasting on an open rotisserie in the front yard, drew a lot of attention. We had cars stopping all day and even had folks from the next street over come and check it out. We made the entire neighborhood smell like bacon. Now that's a good thing!

We ate, we laughed, we spent time with all the people we love. It was one of those days that you hold on to for a long time.

Here's a pic of the pig roasting. Yum!

Graduation Pig Roast 6jpg

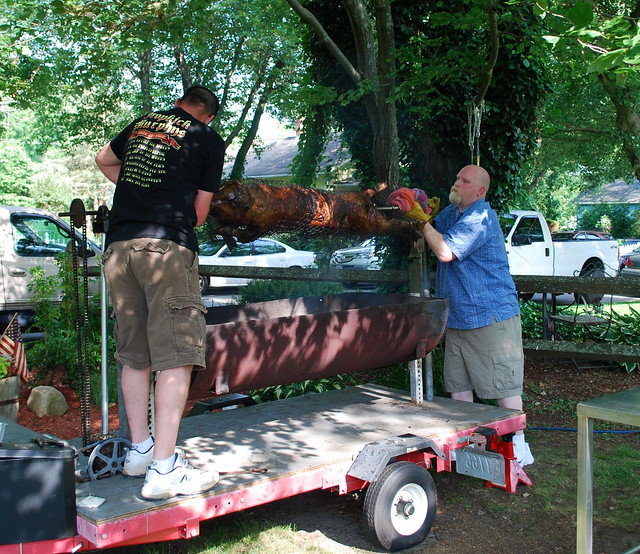
Taking him off the spit.

Graduation Pig Roast 23

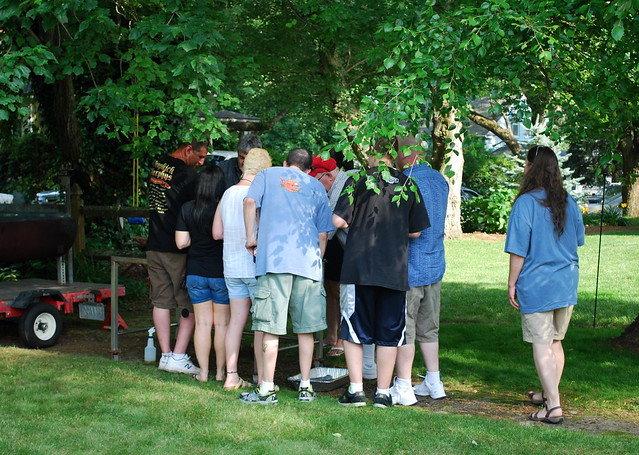
There was a crowd gathering when it came off. Everyone wanted a bite.

Graduation Pig Roast 38

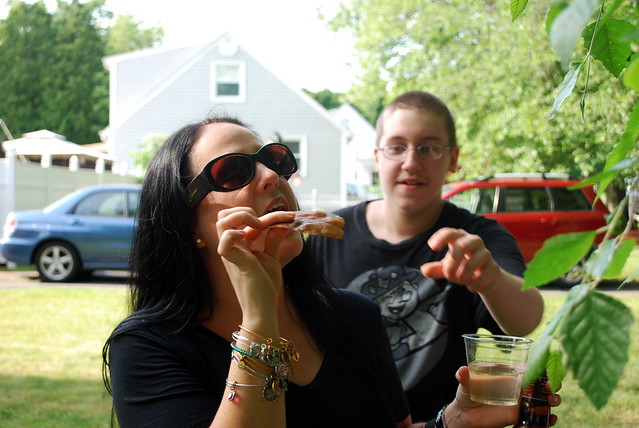
My very happy sister in law eating the skin (my nephew trying to steal it)

Graduation Pig Roast 47

My extremely happy husband. It really was the best tasting pork we've ever had. So moist and juicy. Yum!

Graduation Pig Roast 60

We ate pork for the next 4 days and that was after we shared with a bunch of people! It was a lot of pig! If you're thinking of hosting a pig roast, I highly recommend it!

There was one more thing that I wanted to remind everyone about. As most of you know Google Reader will cease to be very soon. I'm sad. I liked Google reader. I don't know why they had to get rid of it??

Anyway, if you follow my blog through reader you will have to subscribe through a different program. If you already subscribe through Google Reader, you can go to Feedly.com and sign up for an account. It's free. During the sign-up process, this message will come up:

If you already use Google Reader, click on “Connect to Google Reader.”

Voila—your feeds should have seamlessly migrated.

I'll be back with some mouth-watering new recipes! Happy weekend everyone!

Friday, June 14, 2013

Cheesy Spinach Pull Apart Bread

Cheesy Spinach Pull Apart Bread

If ever there was a time that I was in a "frenzy" as my husband calls it, that is what I am in now.

I am frantically prepping the yard and the house for my son's graduation party next weekend. I'm trying to delegate duties but I'm so OCD that I have to oversee them all or I just can't cope. It's one of my many character flaws.

My poor guys have been neglected as far as it dinners go. There's been some ramen, a few things thrown on the grill, quite a few nights of sandwich supper and absolutely no sweets being made.

My list making obsession is totally out of control with this party. I have a 3 page Excel spreadsheet to keep track of everything that needs to be done, the guest list, the groceries. I'm a nut case, but making lists is what keeps me sane when I'm planning something like this.

This weekend is the final prep of the yard and house and shopping for all the non-perishables. Last weekend was totally crazy with my oldest graduating and all the rain we've been having here. I did manage to make this Cheesy Spinach Pull Apart Bread and man am I glad I did.

This was soooooooo good. We dipped it in mariana. Delicious!

Cheesy Spinach Pull Apart Bread.2jpg

Pin It


Cheesy Spinach Pull Apart Bread
recipe from Taste of Home
1 package (8 ounces) cream cheese, softened
2 garlic cloves, minced
1 package (10 ounces) frozen chopped spinach, thawed and squeezed dry
1/2 cup shredded part-skim mozzarella cheese
1/4 cup grated Parmesan cheese
1/4 cup Mayonnaise
2 tubes (one 6 ounces, one 12 ounces) refrigerated buttermilk biscuits * see notes
Marinara sauce for dipping

Preheat oven to 350°. In a small bowl, beat cream cheese & garlic until blended. Stir in spinach, cheeses and mayonnaise.

Separate biscuit dough. Cut each biscuit in half and then flatten each half out with your fingers. Place a tablespoon of the spinach mixture in the middle of the dough, pinching to seal, forming a ball.

Layer the dough balls in a greased 10-in. fluted tube pan. Bake 30 to 40 minutes or until golden brown. Cool in pan 10 minutes before inverting onto a serving plate. Serve warm with marinara sauce if desired. Yield: 15 servings.

Notes:

The original recipe called for slicing these in half horizontally. There was no way! I tried cutting a few that way and it was just to time consuming. I but each biscuit in half and then flattened it with my fingers. Much easier!

This made way too much filling for the amount of biscuits used in this recipe. I saved the remaining filling,topped a crusty loaf of Italian bread with it and baked it until it was crispy and golden brown.

I couldn't find a 6 ounce can of biscuits only a 12 ounce so I used one whole can and half of the other.

The original recipe had a 40 to 50 minute bake time. I'm glad I checked at the 35 minute mark or they would have been burned! So check on these at about the 30 minutes mark to be safe.

Friday, June 7, 2013

Pasta Taco Bake

Pasta Taco Bake1


It's a wonder that I have posted at all over this past week. We have been super busy with the house and yard and planning.

My son turns 18 today and he graduates tonight! Yeah! This is the easy part, sitting through the hours of the commencement, the hard part! We are really excited about this next step in his life. I can't wait to see what the future holds for him!

By tomorrow my inner OCD will be rearing it's ugly head and have me frantically making lists, then re-making list, then double checking lists in preparation for his party. We are having a pig roast so I'm planning on having everything that you would expect to have with a pig roast......pasta and potato salads, corn, beans, corn bread, coleslaw and all the other good eats that go with it. My grocery list is a mile long. Imagine if I had to worry about the meat too! The pig is hubby's department. That's one thing I don't have to worry about.

The yard is almost done. I decided to go out last Sunday night at trim my gigantic holly tree. While I was hacking away at it with my hedge trimmers, John and my neighbor thought they had a better idea. Out came the chainsaw, gone is my holly tree. Gone. What I had left was a gaping whole and crappy looking landscaping on one side of my front stairs. So off we went to buy new plants and shrubs. Another expense I did not plan on. Oh well.

So my list still keeps growing and growing and I am always convinced that I will never finish and I always do. I've got help from my friends and neighbors so I'll be fine. I just have to freak out a little so everyone knows I'm ok.

In the midst of all my madness I made up this little recipe. Knowing the boys love tacos and taco flavored everything this was a no-brainer.

Taco flavored meat with a little of this and a little of that thrown in, add in some cheese and pasta and bake until it's bubbly. Easy peasy and delicious. They loved it.

Pasta Taco Bake

Pin It

Pasta Taco Bake
recipe from Lisa@The Cutting Edge of Ordinary
1 pound of pasta (I used rotini)
1 1/2 pounds ground beef
2 shallots finely chopped
1 envelope of taco seasoning
1 tablespoon chili powder
1 cup water
1 can black beans, rinsed and drained
4 ounces cream cheese
1/2 cup sour cream
14.5oz can diced tomatoes
2 cups of shredded cheddar jack cheese, divided

Oven to 350.

In a large pot cook the pasta until its al dente.

While the pasta is boiling cook the onions with a little bit of olive oil. Once they are tender, add in the ground beef and cook until done. Drain off any excess grease and return to the pan. Add in the taco seasoning package, the chili powder and 1 cup of water. Cook on medium high heat until most of the liquid is absorbed. Add in the cream cheese and sour cream and stir until combined. Add in the beans & tomatoes. Remove from heat and let cool slightly.

Add the pasta and 1 1/2 cups of cheese to the beef mixture and stir to combine. Grease a 9x13 or similar sized casserole dish. Top with remaining  1/2 cup cheese and bake for 30 – 40 minutes, or until hot and bubbly.

Monday, June 3, 2013

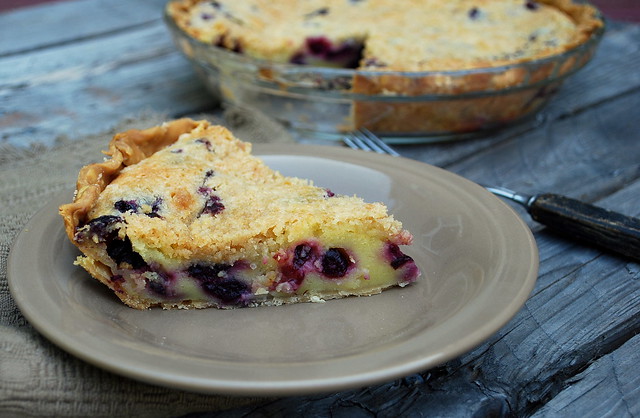
Creamy Blueberry Pie

Creamy Blueberry Pie.3

Pie is my thing. I know for some of you it's cake or ice cream or cupcakes, but for me it's always been pie. That being said I am always on the lookout for delicious new pie recipes and boy did I find one.

This pie, this pie!

I can't rave about it enough. It's so easy to make and so damn delicious.

I'm dwindling down to the last of my frozen berries from last summer's picking. All my blueberries come from the same farm that I've been picking at for years and years, Macombers Blueberry Farm in Coventry, RI. I'm sad to see the last few bags of my blueberry stash disappearing, but if I'm going to use them up on a recipe, this is the one.

I first saw this on my friend Bunny's site Bunny's Warm Oven. Bunny was raving about it too so I decided to make it right away. That doesn't happen too often with me, but I know that most of the recipes and see and have to make right away are usually fantastic, and this one was.

It's so simple to make too. You can make your own pie crust or use the one in the little red box. I used the little red box. It's ok....really.

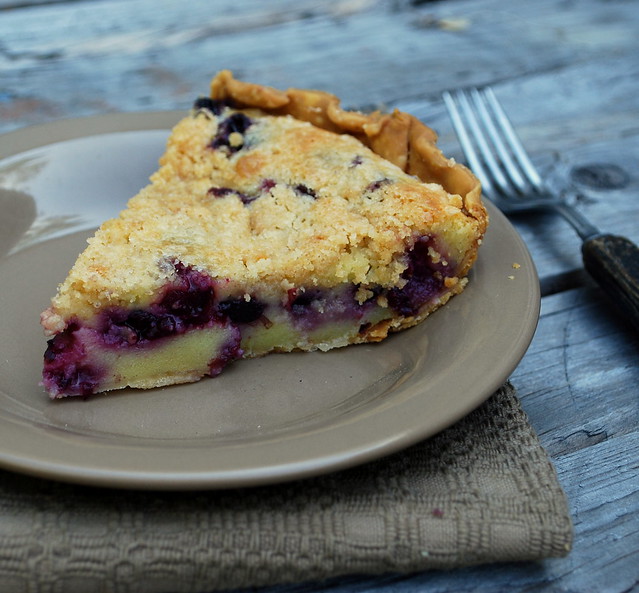
Creamy Blueberry Pie.5

Pin It

This is like a cross between a blueberry pie and a creamy custard. It's not overly sweet, it's just perfect.

Creamy Blueberry Pie
recipe from Bunny's Warm Oven

3 cups blueberries, fresh or frozen (if frozen thaw and drain well)
1 - 9 inch crust. (I placed my pie on parchment lined baking sheet)

For Custard:
1 cup white sugar
1/3 cup all purpose flour
1/8 tsp salt
2 eggs, beaten
2/3 cup sour cream
1 tablespoon of fresh lemon juice

For Streusel topping:
1/4 cup white sugar and 1/4 cup brown sugar
1/2 cup all purpose flour
1/4 cup butter

Preheat oven to 350. Place the blueberries in the pastry shell and set aside.

Combine 1 cup sugar, 1/3 cup flour, and salt. Whisk together. Add the eggs, sour cream and lemon, whisking until blended. Pour the sour cream custard over the blueberries.

In another bowl, combine the sugars and 1/2 cup flour. Cut in the butter with pastry blender until the mixture resembles coarse meal. Sprinkle the topping over the sour cream mixture and berries in the pie shell.

Bake in the preheated oven for 50 to 55 minutes, or until lightly browned. Cool on wire rack. I covered the pie with a pie shield the last 20 minutes of baking to keep the crust from browning to much.